")

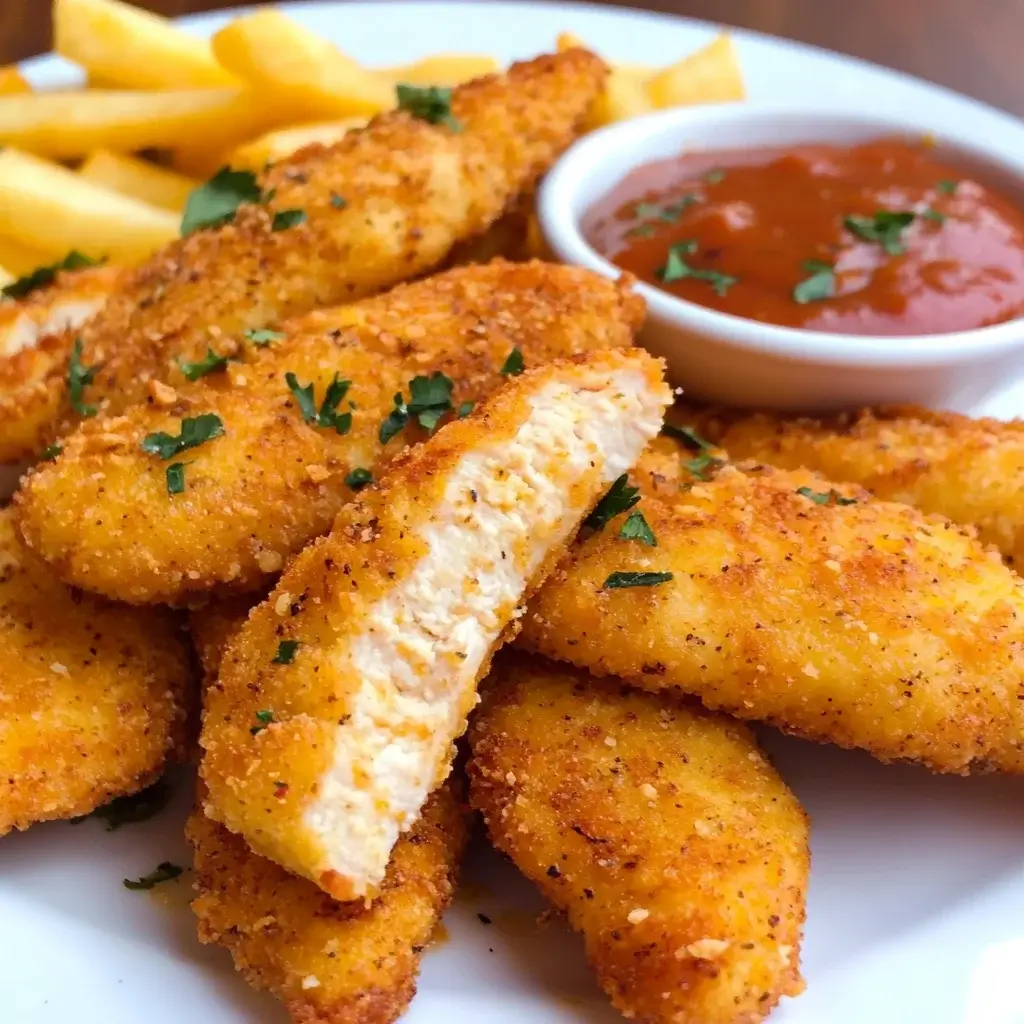

I still remember the first time I pulled these Crispy Baked Chicken Tenders out of the oven. The aroma of seasoned Panko and perfectly cooked chicken filled the kitchen, and frankly, my expectations were high, but cautiously so. We’d tried countless “healthy” chicken tender recipes before, often ending up with slightly sad, soggy strips of chicken or coatings that slid right off. But this time? This time was different. The audible crunch as my partner bit into one was followed by wide eyes and an enthusiastic “Okay, these are amazing!” My kids, usually picky eaters who approach anything “baked not fried” with suspicion, devoured them without a second thought, immediately asking when we could have them again. They became an instant family staple – healthier than their deep-fried cousins, incredibly easy to whip up on a weeknight, and genuinely, satisfyingly crispy in a way I hadn’t thought possible from an oven. They are juicy on the inside, shatteringly crisp on the outside, and versatile enough to please everyone at the table. Forget takeout or the freezer aisle; this recipe is the real deal for achieving perfect chicken tender bliss right in your own kitchen.
Ingredients
Here’s what you’ll need to create these unbelievably crispy baked chicken tenders:
- 1.5 lbs (about 680g) Chicken Tenderloins: These are the small strips of meat attached to the underside of the chicken breast. They are naturally tender and perfectly sized. If unavailable, you can use boneless, skinless chicken breasts cut into even strips (approx. 1-inch wide).
- 1 cup All-Purpose Flour: This forms the base layer for our dredging station, helping the egg wash adhere properly to the chicken.
- 2 Large Eggs: Beaten lightly, the eggs act as the crucial binder, holding the crispy Panko coating onto the chicken tenders.
- 2 cups Panko Breadcrumbs: The star ingredient for crispiness! Panko breadcrumbs are Japanese-style breadcrumbs that are flakier and absorb less oil than traditional breadcrumbs, resulting in a lighter, crunchier coating when baked.
- 1/2 cup Grated Parmesan Cheese: (Optional, but highly recommended) Adds a salty, umami depth of flavor to the coating and aids in browning and crisping. Use freshly grated for the best results.
- 2 tablespoons Olive Oil or Melted Butter: Added to the Panko mixture, this fat helps the breadcrumbs toast and brown beautifully in the oven, mimicking the effect of frying without the excess oil. Avocado oil also works well.
- 1 teaspoon Paprika: Adds a lovely color and mild, sweet peppery flavor. Smoked paprika can be used for a smoky twist.
- 1 teaspoon Garlic Powder: A staple flavor enhancer that pairs perfectly with chicken.
- 1 teaspoon Onion Powder: Provides a savory, slightly sweet background note that complements the garlic.
- 1/2 teaspoon Salt (or to taste): Essential for bringing out all the flavors. Adjust based on your preference and whether your Parmesan is particularly salty.
- 1/2 teaspoon Black Pepper (freshly ground preferred): Adds a touch of warmth and spice. Freshly ground pepper offers a more potent flavor.
- Optional: Pinch of Cayenne Pepper: For those who like a little kick of heat. Adjust the amount according to your spice tolerance.
- Cooking Spray: For greasing the baking sheet or wire rack, preventing sticking and helping the bottoms crisp up.
Instructions
Follow these simple steps for perfectly crispy baked chicken tenders every time:
- Preheat and Prepare: Preheat your oven to 400°F (200°C). Line a large baking sheet with parchment paper for easy cleanup. For maximum crispiness on all sides, place an oven-safe wire rack over the parchment-lined baking sheet and lightly grease the rack with cooking spray. This allows hot air to circulate fully around each tender.
- Prepare the Chicken: Pat the chicken tenderloins completely dry with paper towels. This step is crucial! Removing excess moisture helps the flour adhere better and prevents the coating from becoming soggy. If using chicken breasts, cut them into even, tender-sized strips (about 1 inch wide and 4-5 inches long). Season the chicken lightly with a pinch of salt and pepper if desired (remember there’s salt in the coating).
- Set Up Dredging Stations: You’ll need three shallow dishes or plates.
- Station 1 (Flour): In the first dish, combine the 1 cup of all-purpose flour with a small pinch of salt and pepper. Whisk briefly to combine.
- Station 2 (Egg Wash): In the second dish, crack the 2 large eggs and whisk them thoroughly with a fork until smooth. You can add a tablespoon of water or milk to thin it slightly if preferred, but it’s not essential.
- Station 3 (Panko Coating): In the third dish, combine the 2 cups of Panko breadcrumbs, 1/2 cup grated Parmesan cheese (if using), 1 teaspoon paprika, 1 teaspoon garlic powder, 1 teaspoon onion powder, 1/2 teaspoon salt, 1/2 teaspoon black pepper, and the optional pinch of cayenne pepper. Drizzle the 2 tablespoons of olive oil or melted butter over the Panko mixture. Use a fork or your fingers to toss everything together until the Panko is evenly moistened with the oil and the seasonings are well distributed. This pre-mixing with oil is key to achieving that golden-brown, fried-like crispiness in the oven.
- Dredge the Chicken: Work with one chicken tender at a time, using one hand for the dry ingredients and the other for the wet to minimize mess (the “wet hand, dry hand” method).
- Take a chicken tender and dredge it lightly in the flour mixture (Station 1), shaking off any excess. Ensure it’s fully coated but not caked.
- Using your “wet hand,” dip the flour-coated tender into the beaten egg wash (Station 2), making sure it’s completely submerged. Allow any excess egg to drip off for a few seconds.
- Transfer the egg-coated tender to the Panko mixture (Station 3). Using your “dry hand,” gently press the Panko mixture onto all sides of the chicken tender, ensuring a thick, even coating. Really press it on firmly – this helps the coating adhere during baking.
- Arrange on Baking Rack/Sheet: Carefully place the coated chicken tender onto the prepared wire rack (or directly onto the parchment-lined baking sheet if not using a rack). Ensure there is some space between each tender; do not overcrowd the pan. Overcrowding will cause the tenders to steam rather than crisp up. Use a second baking sheet if necessary.
- Bake: Place the baking sheet with the chicken tenders into the preheated 400°F (200°C) oven. Bake for 15-20 minutes. The exact time will depend on the thickness of your tenders.
- Flip for Even Crisping (Optional but Recommended): For optimal crispiness, especially if not using a wire rack, carefully flip the chicken tenders halfway through the baking time (around the 8-10 minute mark) using tongs. If using a wire rack, flipping might not be strictly necessary but can still help ensure maximum even browning.
- Check for Doneness: The chicken tenders are done when they are golden brown, crispy, and the internal temperature reaches 165°F (74°C) when measured with a meat thermometer inserted into the thickest part of a tender. The juices should run clear if pierced with a fork. Be careful not to overcook, as tenderloins can dry out quickly.
- Rest Briefly and Serve: Once cooked, remove the baking sheet from the oven. Let the crispy baked chicken tenders rest on the rack for a minute or two before serving. This allows the juices to redistribute slightly, ensuring a tender bite. Serve immediately with your favorite dipping sauces.
Nutrition Facts
While exact values depend on specific ingredients and tender size, here’s an approximate nutritional overview per serving (assuming the recipe yields 4 servings):
- Servings: 4
- Calories per Serving: Approximately 450-550 kcal (This is significantly lower than deep-fried versions due to baking).
- Protein: Approximately 45-55g (Chicken is an excellent source of lean protein, crucial for muscle building and satiety).
- Fat: Approximately 15-25g (Mainly from the olive oil/butter, Parmesan, and chicken itself. Lower than fried alternatives).
- Carbohydrates: Approximately 25-35g (Primarily from the flour and Panko breadcrumbs).
- Sodium: Approximately 600-800mg (Can be adjusted by controlling the amount of salt added and the type of Parmesan used).
(Note: These are estimates. For precise nutritional information, consider using an online recipe calculator with your specific ingredient brands and measurements.)
Preparation Time
This recipe is relatively quick and perfect for busy weeknights:
- Prep time: Approximately 20 minutes (Includes preparing the chicken, setting up dredging stations, and coating the tenders).
- Cook time: Approximately 15-20 minutes.
- Total time: Approximately 35-40 minutes from start to finish.
How to Serve
These Crispy Baked Chicken Tenders are incredibly versatile! Here are some delicious ways to serve them:
- Classic Combo:
- Serve hot with classic dipping sauces like Ketchup, Honey Mustard, BBQ Sauce, or Ranch Dressing.
- Pair with a side of baked french fries (keep it oven-baked!), sweet potato fries, or potato wedges for the ultimate comfort food experience.
- Healthier Options:
- Serve alongside a fresh garden salad with a light vinaigrette.
- Pair with steamed or roasted vegetables like broccoli, green beans, or carrots.
- Offer lighter dips like Greek yogurt ranch, hummus, or a simple marinara sauce.
- Get Creative:
- Chicken Tender Wraps: Slice the tenders and wrap them in tortillas with lettuce, tomato, cheese, and your favorite sauce.
- Chicken Tender Salad: Chop the tenders and add them as a crispy protein topping to a large Caesar salad or mixed greens salad.
- Chicken Parmesan Style: Serve topped with marinara sauce and melted mozzarella cheese, alongside pasta.
- Kid-Friendly Platter: Arrange tenders on a platter with various dips, fruit slices, and veggie sticks (like cucumber and bell peppers) for a fun and balanced meal.
- Appetizer Star: Serve smaller portions with a variety of gourmet dipping sauces for parties or game days (think spicy mayo, garlic aioli, sweet chili sauce).
- Dipping Sauce Extravaganza (Beyond the Basics):
- Spicy Mayo: Mix mayonnaise with sriracha or your favorite hot sauce.
- Garlic Aioli: Combine mayonnaise with minced garlic, lemon juice, and a pinch of salt.
- Sweet Chili Sauce: A store-bought favorite that offers a sweet and spicy kick.
- Avocado Ranch: Blend ranch dressing with ripe avocado for a creamy, healthier twist.
- Blue Cheese Dressing: A classic pairing, especially if you add a touch of buffalo spice to the tenders.
- Fry Sauce: Often a mix of ketchup and mayonnaise, sometimes with pickle relish or Worcestershire sauce.
Additional Tips for Ultimate Crispiness and Flavor
Unlock the full potential of your baked chicken tenders with these pro tips:
- Don’t Skip Patting Dry: Seriously, moisture is the enemy of crispiness. Patting the chicken thoroughly dry with paper towels before dredging ensures the flour sticks properly, forming the foundation for a truly crispy crust.
- Use Panko, Always Panko: While regular breadcrumbs work, Panko breadcrumbs are specifically designed for airiness and crunch. Their jagged, larger flakes create a much crispier, lighter coating that mimics deep-frying remarkably well in the oven.
- Toast the Panko First (Optional Advanced Tip): For an even deeper golden color and guaranteed crispiness, you can lightly toast the Panko breadcrumbs (after mixing with oil and seasonings) in a dry skillet over medium heat for 3-5 minutes, stirring constantly, until fragrant and lightly golden before dredging the chicken. Let them cool completely before using.
- Embrace the Wire Rack: Baking the tenders on an oven-safe wire rack set over a baking sheet is the single best way to get crispy bottoms. It allows hot air to circulate underneath the chicken, preventing that dreaded sogginess that can happen when they sit directly on the pan.
- Press the Breading Firmly: When coating the chicken in the Panko mixture, don’t be shy! Gently but firmly press the breadcrumbs onto the chicken to ensure they adhere well and don’t fall off during baking or handling.
- Don’t Overcrowd the Pan: Give your chicken tenders space to breathe on the baking sheet/rack. If they’re too close together, they will steam each other instead of crisping up. Use two baking sheets if necessary to ensure proper spacing.
- High Heat is Key: Baking at a relatively high temperature like 400°F (200°C) helps the coating crisp up quickly before the chicken inside has a chance to overcook and dry out. Ensure your oven is fully preheated.
- Spice It Up Your Way: Don’t feel limited by the suggested seasonings! Feel free to experiment. Add smoked paprika for smokiness, cayenne for heat, dried herbs like oregano or thyme for an Italian flair, or even a bit of chili powder and cumin for a Tex-Mex vibe. Customizing the flavor profile is part of the fun!
FAQ (Frequently Asked Questions)
Here are answers to some common questions about making crispy baked chicken tenders:
- Q: Can I use chicken breasts instead of tenderloins?
A: Absolutely! Boneless, skinless chicken breasts work great. Simply cut them lengthwise into even strips, about 1-inch wide and similar in length to tenderloins. Be mindful that cooking time might vary slightly depending on the thickness of your strips, so keep an eye on them and use a meat thermometer to ensure they reach 165°F (74°C). - Q: How can I make these gluten-free?
A: Yes, easily! Substitute the all-purpose flour with a gluten-free all-purpose flour blend (one containing xanthan gum usually works well). For the breadcrumbs, use gluten-free Panko breadcrumbs, which are readily available in most supermarkets, or crushed gluten-free cornflakes or pork rinds for a different crunchy texture. Ensure your spices and Parmesan are also certified gluten-free if Celiac disease is a concern. - Q: Can I make these in an air fryer?
A: Yes, these adapt beautifully to the air fryer! Preheat your air fryer to 380°F (190°C). Arrange the coated tenders in a single layer in the air fryer basket (work in batches if needed, don’t overcrowd). Spray lightly with cooking spray. Air fry for 10-14 minutes, flipping halfway through, until golden brown, crispy, and the internal temperature reaches 165°F (74°C). Air frying often results in even crispier tenders! - Q: Why didn’t my baked chicken tenders get crispy?
A: Several factors could be at play:- Moisture: The chicken wasn’t patted dry enough.
- Overcrowding: The pan was too full, causing steaming.
- Oven Temp: The oven wasn’t fully preheated, or the temperature was too low.
- No Fat in Panko: Forgetting to mix oil/butter into the Panko makes it harder to brown and crisp.
- Wrong Breadcrumbs: Using fine, traditional breadcrumbs instead of Panko.
- No Wire Rack: Baking directly on parchment can sometimes lead to slightly less crispy bottoms.
- Underbaking: They simply might need a few more minutes in the oven.
- Q: Can I freeze these chicken tenders?
A: Yes! You can freeze them either cooked or uncooked.- Freezing Cooked: Let the baked tenders cool completely. Place them in a single layer on a baking sheet and freeze until solid (about 1-2 hours). Transfer to a freezer-safe bag or container. Reheat from frozen in a 400°F (200°C) oven or air fryer for 10-15 minutes until heated through and crispy again.
- Freezing Uncooked: Arrange the coated, uncooked tenders in a single layer on a parchment-lined baking sheet. Freeze until solid, then transfer to a freezer bag. Bake directly from frozen, adding about 5-10 minutes to the original baking time.
- Q: Can I prepare these ahead of time?
A: You can prepare the components ahead. Set up your dredging stations (keep flour, egg, and Panko separate and covered in the fridge) a few hours in advance. You can also coat the chicken tenders up to a few hours ahead, place them on the prepared rack/baking sheet, cover loosely with plastic wrap, and refrigerate. However, for the absolute best crispiness, it’s recommended to dredge and bake them just before serving, as the coating can get slightly soggy if it sits on the raw chicken for too long in the fridge. Cooked tenders reheat well (see freezing/reheating tip). - Q: How can I make them spicier?
A: Easily increase the heat! Add more cayenne pepper (start with 1/4 teaspoon and increase), include red pepper flakes in the Panko mixture, add a dash of hot sauce to the egg wash, or use a spicy seasoning blend (like Cajun or chili powder) in place of or addition to the paprika/garlic/onion powder. Serving with a spicy dipping sauce is also a great option. - Q: What’s the difference between chicken tenders (tenderloins) and chicken strips?
A: Chicken tenderloins (often just called “tenders”) are a specific muscle: the pectoralis minor, a small strip of meat located on the underside of the chicken breast. They are naturally very tender. Chicken strips, on the other hand, are typically just slices cut from the main chicken breast (pectoralis major). While you can cut breast meat into strips to mimic tenders (as suggested in Q1), true tenderloins are a distinct cut known for their inherent tenderness. Both work well for this recipe.

Crispy Baked Chicken Tenders
Ingredients
Here’s what you’ll need to create these unbelievably crispy baked chicken tenders:
- 1.5 lbs (about 680g) Chicken Tenderloins: These are the small strips of meat attached to the underside of the chicken breast. They are naturally tender and perfectly sized. If unavailable, you can use boneless, skinless chicken breasts cut into even strips (approx. 1-inch wide).
- 1 cup All-Purpose Flour: This forms the base layer for our dredging station, helping the egg wash adhere properly to the chicken.
- 2 Large Eggs: Beaten lightly, the eggs act as the crucial binder, holding the crispy Panko coating onto the chicken tenders.
- 2 cups Panko Breadcrumbs: The star ingredient for crispiness! Panko breadcrumbs are Japanese-style breadcrumbs that are flakier and absorb less oil than traditional breadcrumbs, resulting in a lighter, crunchier coating when baked.
- 1/2 cup Grated Parmesan Cheese: (Optional, but highly recommended) Adds a salty, umami depth of flavor to the coating and aids in browning and crisping. Use freshly grated for the best results.
- 2 tablespoons Olive Oil or Melted Butter: Added to the Panko mixture, this fat helps the breadcrumbs toast and brown beautifully in the oven, mimicking the effect of frying without the excess oil. Avocado oil also works well.
- 1 teaspoon Paprika: Adds a lovely color and mild, sweet peppery flavor. Smoked paprika can be used for a smoky twist.
- 1 teaspoon Garlic Powder: A staple flavor enhancer that pairs perfectly with chicken.
- 1 teaspoon Onion Powder: Provides a savory, slightly sweet background note that complements the garlic.
- 1/2 teaspoon Salt (or to taste): Essential for bringing out all the flavors. Adjust based on your preference and whether your Parmesan is particularly salty.
- 1/2 teaspoon Black Pepper (freshly ground preferred): Adds a touch of warmth and spice. Freshly ground pepper offers a more potent flavor.
- Optional: Pinch of Cayenne Pepper: For those who like a little kick of heat. Adjust the amount according to your spice tolerance.
- Cooking Spray: For greasing the baking sheet or wire rack, preventing sticking and helping the bottoms crisp up.
Instructions
Follow these simple steps for perfectly crispy baked chicken tenders every time:
- Preheat and Prepare: Preheat your oven to 400°F (200°C). Line a large baking sheet with parchment paper for easy cleanup. For maximum crispiness on all sides, place an oven-safe wire rack over the parchment-lined baking sheet and lightly grease the rack with cooking spray. This allows hot air to circulate fully around each tender.
- Prepare the Chicken: Pat the chicken tenderloins completely dry with paper towels. This step is crucial! Removing excess moisture helps the flour adhere better and prevents the coating from becoming soggy. If using chicken breasts, cut them into even, tender-sized strips (about 1 inch wide and 4-5 inches long). Season the chicken lightly with a pinch of salt and pepper if desired (remember there’s salt in the coating).
- Set Up Dredging Stations: You’ll need three shallow dishes or plates.
- Station 1 (Flour): In the first dish, combine the 1 cup of all-purpose flour with a small pinch of salt and pepper. Whisk briefly to combine.
- Station 2 (Egg Wash): In the second dish, crack the 2 large eggs and whisk them thoroughly with a fork until smooth. You can add a tablespoon of water or milk to thin it slightly if preferred, but it’s not essential.
- Station 3 (Panko Coating): In the third dish, combine the 2 cups of Panko breadcrumbs, 1/2 cup grated Parmesan cheese (if using), 1 teaspoon paprika, 1 teaspoon garlic powder, 1 teaspoon onion powder, 1/2 teaspoon salt, 1/2 teaspoon black pepper, and the optional pinch of cayenne pepper. Drizzle the 2 tablespoons of olive oil or melted butter over the Panko mixture. Use a fork or your fingers to toss everything together until the Panko is evenly moistened with the oil and the seasonings are well distributed. This pre-mixing with oil is key to achieving that golden-brown, fried-like crispiness in the oven.
- Dredge the Chicken: Work with one chicken tender at a time, using one hand for the dry ingredients and the other for the wet to minimize mess (the “wet hand, dry hand” method).
- Take a chicken tender and dredge it lightly in the flour mixture (Station 1), shaking off any excess. Ensure it’s fully coated but not caked.
- Using your “wet hand,” dip the flour-coated tender into the beaten egg wash (Station 2), making sure it’s completely submerged. Allow any excess egg to drip off for a few seconds.
- Transfer the egg-coated tender to the Panko mixture (Station 3). Using your “dry hand,” gently press the Panko mixture onto all sides of the chicken tender, ensuring a thick, even coating. Really press it on firmly – this helps the coating adhere during baking.
- Arrange on Baking Rack/Sheet: Carefully place the coated chicken tender onto the prepared wire rack (or directly onto the parchment-lined baking sheet if not using a rack). Ensure there is some space between each tender; do not overcrowd the pan. Overcrowding will cause the tenders to steam rather than crisp up. Use a second baking sheet if necessary.
- Bake: Place the baking sheet with the chicken tenders into the preheated 400°F (200°C) oven. Bake for 15-20 minutes. The exact time will depend on the thickness of your tenders.
- Flip for Even Crisping (Optional but Recommended): For optimal crispiness, especially if not using a wire rack, carefully flip the chicken tenders halfway through the baking time (around the 8-10 minute mark) using tongs. If using a wire rack, flipping might not be strictly necessary but can still help ensure maximum even browning.
- Check for Doneness: The chicken tenders are done when they are golden brown, crispy, and the internal temperature reaches 165°F (74°C) when measured with a meat thermometer inserted into the thickest part of a tender. The juices should run clear if pierced with a fork. Be careful not to overcook, as tenderloins can dry out quickly.
- Rest Briefly and Serve: Once cooked, remove the baking sheet from the oven. Let the crispy baked chicken tenders rest on the rack for a minute or two before serving. This allows the juices to redistribute slightly, ensuring a tender bite. Serve immediately with your favorite dipping sauces.
Nutrition
- Serving Size: one normal portion
- Calories: 550
- Sodium: 800mg
- Fat: 25g
- Carbohydrates: 35g
- Protein: 55g


