")

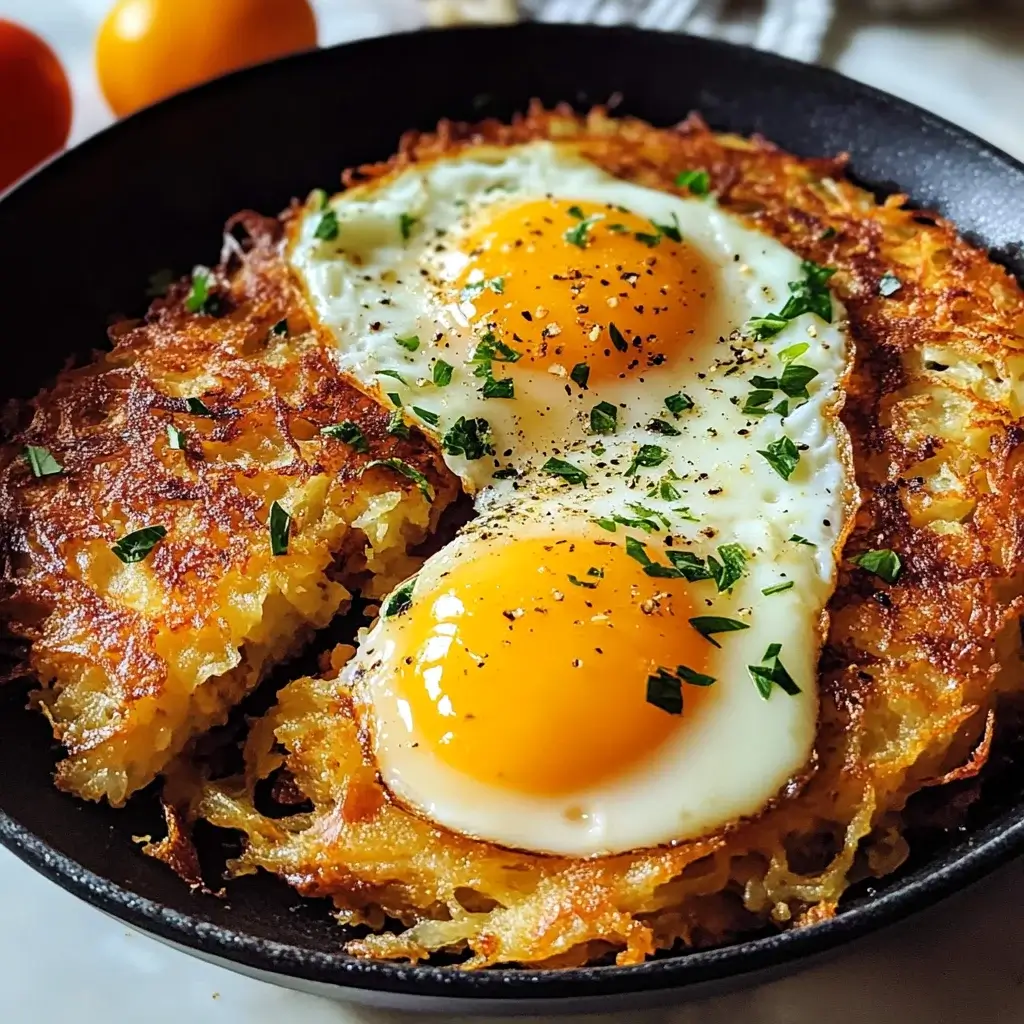

There are certain breakfast dishes that just feel like a warm hug on a plate, and this Crispy Hash Brown and Egg recipe is undoubtedly one of them. I remember the first time I perfected it; the kitchen filled with the irresistible aroma of sizzling potatoes, and the look of pure delight on my family’s faces when they cut into that perfectly crispy nest to reveal a gloriously runny yolk mingling with the golden-brown potato shreds. It wasn’t just breakfast; it was an event. Since then, it’s become a weekend staple, a dish requested for special brunches, and even a satisfying “brinner” (breakfast-for-dinner) option when comfort food is desperately needed. The beauty lies in its simplicity, yet the result feels gourmet. Achieving that ultimate crispiness took a few tries, learning the secrets of moisture removal and the right cooking technique, but the payoff is immense. That contrast between the crunchy, well-seasoned potato base and the rich, soft-cooked egg is pure culinary magic. It’s versatile, satisfying, and guaranteed to impress, transforming humble ingredients into a star dish. This recipe isn’t just about feeding people; it’s about creating moments of simple, delicious joy.
Ingredients
- Shredded Hash Browns: 4 cups (about 20-24 oz), preferably frozen, thawed completely, and squeezed very dry. (Using thawed frozen hash browns saves time, but ensure excess moisture is removed for crispiness).
- Large Eggs: 4-6 (depending on how many nests you make). (The star of the show, cooked within the hash brown nest).
- Unsalted Butter: 4 tablespoons, melted (or substitute with olive oil or bacon fat for different flavor profiles). (Adds richness and helps achieve that golden-brown crisp).
- Salt: 1 teaspoon, or to taste. (Essential seasoning for the potatoes).
- Black Pepper: ½ teaspoon, freshly ground, or to taste. (Adds a touch of warmth and spice).
- Optional Seasonings: ½ teaspoon garlic powder, ½ teaspoon onion powder, ¼ teaspoon paprika (smoked or sweet). (Enhances the flavor profile of the hash browns).
- Optional additions: ¼ cup grated sharp cheddar cheese, Parmesan cheese, or chopped chives/parsley for garnish. (For extra flavor and visual appeal).
Instructions
- Preheat and Prepare: Preheat your oven to 400°F (200°C). Generously grease a standard 6-cup muffin tin or individual ramekins with butter or non-stick cooking spray. If not using a muffin tin, you can form free-standing nests on a parchment-lined baking sheet, but a muffin tin helps maintain shape and promotes even crisping.
- Dry the Potatoes (Crucial Step!): Place the thawed hash browns in the center of a clean kitchen towel (a cheesecloth or sturdy paper towels work too). Gather the ends of the towel and twist tightly, squeezing out as much excess moisture as possible over the sink. Repeat if necessary. This step is absolutely critical – removing water allows the potatoes to crisp up instead of steaming. Wet potatoes will result in soggy hash browns. You’ll be surprised how much liquid comes out!
- Season the Hash Browns: Transfer the dried hash browns to a large bowl. Pour the melted butter (or chosen fat) over the potatoes. Add the salt, black pepper, and any optional seasonings like garlic powder, onion powder, or paprika. Toss everything together thoroughly with your hands or a spatula, ensuring the potatoes are evenly coated with fat and seasonings.
- Form the Nests: Divide the seasoned hash brown mixture evenly among the prepared muffin cups (or form into nest shapes on the baking sheet). Press the mixture firmly against the bottom and up the sides of each cup using your fingers or the back of a small spoon. Create a distinct indentation or “well” in the center of each nest – this is where the egg will sit. Ensure the base and walls are compact; this helps the nest hold its shape and crisp evenly. Don’t make the walls too thin, or they might burn before the base is crispy.
- First Bake (Pre-baking for Crispiness): Place the muffin tin (or baking sheet) into the preheated oven. Bake for 20-25 minutes, or until the edges and bases of the hash brown nests are golden brown and starting to look crispy. This pre-baking step is vital for ensuring the potato part is properly cooked and crispy before adding the egg, which requires less cooking time. Check halfway through; if using a baking sheet, you might need to rotate it for even browning.
- Add the Eggs: Carefully remove the muffin tin from the oven. If desired, sprinkle a little grated cheese into the bottom of each nest now. Gently crack one large egg into the well of each hash brown nest. Be careful not to break the yolk. Season the top of each egg lightly with a pinch of salt and pepper.
- Second Bake (Cooking the Eggs): Return the muffin tin to the oven. Bake for another 10-15 minutes. The exact time will depend on how well-done you like your egg yolks. For runny yolks, aim for the shorter end (around 10-12 minutes) – the egg whites should be completely set, but the yolk should still jiggle slightly. For firmer yolks, bake closer to 15 minutes or slightly longer. Keep a close eye on them during the last few minutes to prevent overcooking.
- Rest and Serve: Once the eggs are cooked to your liking, carefully remove the muffin tin from the oven. Let the crispy hash brown and egg nests rest in the tin for a minute or two – this makes them easier to remove. Use a small offset spatula or a butter knife to gently loosen the edges of each nest and lift them out. Garnish with chopped fresh chives, parsley, or extra cheese if desired. Serve immediately while hot and crispy.
Nutrition Facts
- Servings: Makes 4-6 nests/servings.
- Calories per Serving: Approximately 250-350 kcal (This is an estimate and can vary significantly based on the size of the nests, amount of butter/oil used, and optional additions like cheese).
- Protein: Provides a good source of protein (approx. 8-12g per serving), primarily from the egg, essential for satiety and muscle maintenance.
- Carbohydrates: Contains carbohydrates (approx. 15-25g per serving) mainly from the potatoes, offering energy.
- Fat: Includes fats (approx. 15-25g per serving) from the butter/oil and egg yolk, contributing to flavor and nutrient absorption. Using leaner fats or less butter can reduce this.
(Note: These values are approximate and for informational purposes only. Actual nutrition will vary based on specific ingredients and quantities used.)
Preparation Time
- Total Time: Approximately 45-55 minutes.
- Prep Time: 15 minutes (includes thawing time if needed, squeezing potatoes, seasoning, and forming nests).
- Cook Time: 30-40 minutes (includes the initial pre-bake and the final bake with the egg).
- Short Description: This recipe requires a bit of oven time but relatively minimal active preparation, making it perfect for a relaxed weekend breakfast, a special brunch gathering, or even a surprisingly quick weeknight “brinner” if you prep the potatoes ahead.
How to Serve
These Crispy Hash Brown and Egg nests are fantastic on their own, but they also pair beautifully with various accompaniments. Here are some serving suggestions:
- Classic Breakfast Platter:
- Serve alongside crispy bacon strips or savory sausage links/patties.
- Add a side of fresh fruit salad (berries, melon, grapes) for sweetness and balance.
- Include a slice of whole-wheat toast or a flaky biscuit.
- Brunch Star:
- Arrange nests on a platter garnished generously with fresh herbs like chives or parsley.
- Offer a dollop of sour cream, Greek yogurt, or crème fraîche on the side.
- Serve with smoked salmon slices and capers for an elegant touch.
- A light green salad with a vinaigrette dressing complements the richness.
- Flavor Enhancements:
- Drizzle with your favorite hot sauce (like Sriracha or Cholula) for a spicy kick.
- Top with sliced avocado or a scoop of guacamole for creamy texture and healthy fats.
- Sprinkle with crumbled feta cheese or goat cheese after baking.
- Serve with a side of salsa or pico de gallo for freshness.
- Simple & Satisfying:
- Enjoy two nests as a complete light meal.
- Serve with steamed or roasted asparagus spears.
- Pair with sautéed spinach or kale for added greens.
Additional Tips
- The Squeeze is Non-Negotiable: We mentioned it in the instructions, but it bears repeating: thoroughly squeezing the moisture out of the thawed hash browns is the single most important step for achieving true crispiness. Don’t rush this. Use a towel you don’t mind potentially staining slightly, or multiple layers of strong paper towels. The drier the potatoes, the crispier the result.
- Fat Matters for Flavor and Crisp: While melted butter provides classic flavor, consider alternatives. Bacon fat imparts a wonderful smoky depth. Olive oil works well for a slightly different taste and can contribute to crispiness. A high-smoke-point oil like avocado or grapeseed oil is also excellent for ensuring the potatoes brown without burning. Don’t skimp on the fat – it’s essential for browning and preventing sticking.
- Pack the Nests Firmly: When pressing the hash browns into the muffin tin or forming them on a sheet pan, apply firm pressure. This compactness helps the nests hold their shape during baking and ensures good contact with the hot surface, promoting even crisping on the bottom and sides. Make sure the well for the egg is deep enough to contain it.
- Don’t Skip the Pre-Bake: Baking the hash brown nests before adding the egg is crucial. It allows the potatoes sufficient time to cook through and become properly crispy. If you add the egg too early, the potatoes underneath might remain soft or soggy by the time the egg is cooked.
- Cheese Placement Strategy: If adding cheese (like cheddar or Monterey Jack), you have options. Mixing some directly into the hash brown mixture adds flavor throughout. Sprinkling it in the bottom of the well before adding the egg creates a cheesy base. Sprinkling it over the egg during the last few minutes of baking results in a melted, bubbly topping. Parmesan added to the hash brown mix boosts umami and aids crisping.
- Customize Your Seasonings: The basic salt, pepper, garlic powder, and onion powder are great starting points. Feel free to experiment! Smoked paprika adds lovely color and smokiness. A pinch of cayenne pepper brings heat. Dried herbs like thyme or rosemary mixed into the potatoes offer an earthy flavor. Everything bagel seasoning sprinkled on top before the final bake is also delicious.
- Muffin Tin vs. Baking Sheet: A standard metal muffin tin is generally the easiest method, yielding uniform nests that crisp well on all sides due to contained heat. If using a baking sheet, line it with parchment paper for easier cleanup and to prevent sticking. Free-form nests might spread slightly more and require careful monitoring to ensure the edges don’t burn before the center is cooked. Ramekins work well for larger, individual portions.
- Make-Ahead Component: You can prepare the hash brown nests (steps 1-5, the pre-baking) a day ahead. Let them cool completely, then cover the muffin tin tightly with plastic wrap and refrigerate. When ready to serve, remove the plastic wrap, crack the eggs into the wells, and proceed with the final bake (step 7). You might need to add a couple of extra minutes to the final baking time since the nests will be cold.
FAQ Section
1. Q: My hash brown nests weren’t crispy. What went wrong?
A: The most likely culprit is excess moisture in the potatoes. Ensure you squeezed the thawed hash browns extremely well using a clean kitchen towel or cheesecloth. Other factors could be not preheating the oven sufficiently, not using enough fat, or skipping the crucial pre-baking step before adding the egg. Also, ensure you packed the hash browns firmly into the muffin tin or onto the baking sheet.
2. Q: Can I use fresh potatoes instead of frozen hash browns?
A: Absolutely! Use starchy potatoes like Russets. Peel and shred them using the large holes of a box grater. Immediately place the shredded potatoes in a bowl of cold water to prevent browning. Drain them well, then proceed with the critical step of squeezing out as much moisture as possible, just like with frozen hash browns. Freshly shredded potatoes often contain even more water, so be extra thorough with the squeezing.
3. Q: How can I make this recipe vegetarian or vegan?
A: The recipe as written (using butter and eggs) is already vegetarian. To make it vegan, you would need to replace the butter with a plant-based butter alternative or olive oil. The main challenge is replacing the egg. You could try filling the pre-baked nests with seasoned crumbled tofu scramble, a commercial vegan egg substitute prepared according to package directions, or even sautéed vegetables like mushrooms and spinach, though this changes the nature of the dish significantly.
4. Q: Are these Crispy Hash Brown and Egg nests gluten-free?
A: Yes, provided your shredded hash browns are purely potatoes without any added wheat-based fillers or coatings (most plain frozen hash browns are). Always check the packaging ingredients to be certain. Potatoes, eggs, butter, salt, pepper, and common spices are naturally gluten-free.
5. Q: How do I store and reheat leftovers?
A: Store leftover nests in an airtight container in the refrigerator for up to 2 days. Reheating can be tricky to maintain crispiness. The best method is using an oven or toaster oven: place the nests on a baking sheet and reheat at 350°F (175°C) for 10-15 minutes, or until heated through and re-crisped. Microwaving is possible but will likely result in softer hash browns and potentially overcooked eggs. An air fryer at around 350°F for 5-8 minutes can also work well for re-crisping.
6. Q: Can I make a larger batch for a crowd?
A: Yes, this recipe scales easily. You can use multiple muffin tins or large baking sheets to make more nests simultaneously. Ensure your oven has good air circulation, and you might need to rotate the pans halfway through baking for even cooking and crisping. Just be prepared to handle more potatoes for the squeezing step!
7. Q: My eggs cooked too quickly/slowly. How do I get the perfect yolk?
A: Oven temperatures can vary, and the initial temperature of your eggs matters. For runnier yolks, start checking around the 10-minute mark after adding the eggs. Look for set whites but a jiggly yolk. If they’re cooking too fast, slightly lower the oven temperature for the final bake next time. If they’re taking too long, ensure your oven reached the correct temperature during preheating, and consider using eggs that are closer to room temperature (let them sit out for 15-20 minutes before cracking).
8. Q: Can I add meat or vegetables directly into the hash brown mixture?
A: Yes, you can! Finely diced pre-cooked bacon, crumbled cooked sausage, or chopped ham can be mixed in with the seasoned potatoes before forming the nests. You can also add finely chopped onions, bell peppers, or drained sautéed mushrooms. Ensure any additions are small and relatively dry to avoid adding excess moisture that could hinder crisping. Adding these ingredients will enhance flavor and texture complexity.
Crispy Hash Brown and Egg
Ingredients
- Shredded Hash Browns: 4 cups (about 20-24 oz), preferably frozen, thawed completely, and squeezed very dry. (Using thawed frozen hash browns saves time, but ensure excess moisture is removed for crispiness).
- Large Eggs: 4-6 (depending on how many nests you make). (The star of the show, cooked within the hash brown nest).
- Unsalted Butter: 4 tablespoons, melted (or substitute with olive oil or bacon fat for different flavor profiles). (Adds richness and helps achieve that golden-brown crisp).
- Salt: 1 teaspoon, or to taste. (Essential seasoning for the potatoes).
- Black Pepper: ½ teaspoon, freshly ground, or to taste. (Adds a touch of warmth and spice).
- Optional Seasonings: ½ teaspoon garlic powder, ½ teaspoon onion powder, ¼ teaspoon paprika (smoked or sweet). (Enhances the flavor profile of the hash browns).
- Optional additions: ¼ cup grated sharp cheddar cheese, Parmesan cheese, or chopped chives/parsley for garnish. (For extra flavor and visual appeal).
Instructions
- Preheat and Prepare: Preheat your oven to 400°F (200°C). Generously grease a standard 6-cup muffin tin or individual ramekins with butter or non-stick cooking spray. If not using a muffin tin, you can form free-standing nests on a parchment-lined baking sheet, but a muffin tin helps maintain shape and promotes even crisping.
- Dry the Potatoes (Crucial Step!): Place the thawed hash browns in the center of a clean kitchen towel (a cheesecloth or sturdy paper towels work too). Gather the ends of the towel and twist tightly, squeezing out as much excess moisture as possible over the sink. Repeat if necessary. This step is absolutely critical – removing water allows the potatoes to crisp up instead of steaming. Wet potatoes will result in soggy hash browns. You’ll be surprised how much liquid comes out!
- Season the Hash Browns: Transfer the dried hash browns to a large bowl. Pour the melted butter (or chosen fat) over the potatoes. Add the salt, black pepper, and any optional seasonings like garlic powder, onion powder, or paprika. Toss everything together thoroughly with your hands or a spatula, ensuring the potatoes are evenly coated with fat and seasonings.
- Form the Nests: Divide the seasoned hash brown mixture evenly among the prepared muffin cups (or form into nest shapes on the baking sheet). Press the mixture firmly against the bottom and up the sides of each cup using your fingers or the back of a small spoon. Create a distinct indentation or “well” in the center of each nest – this is where the egg will sit. Ensure the base and walls are compact; this helps the nest hold its shape and crisp evenly. Don’t make the walls too thin, or they might burn before the base is crispy.
- First Bake (Pre-baking for Crispiness): Place the muffin tin (or baking sheet) into the preheated oven. Bake for 20-25 minutes, or until the edges and bases of the hash brown nests are golden brown and starting to look crispy. This pre-baking step is vital for ensuring the potato part is properly cooked and crispy before adding the egg, which requires less cooking time. Check halfway through; if using a baking sheet, you might need to rotate it for even browning.
- Add the Eggs: Carefully remove the muffin tin from the oven. If desired, sprinkle a little grated cheese into the bottom of each nest now. Gently crack one large egg into the well of each hash brown nest. Be careful not to break the yolk. Season the top of each egg lightly with a pinch of salt and pepper.
- Second Bake (Cooking the Eggs): Return the muffin tin to the oven. Bake for another 10-15 minutes. The exact time will depend on how well-done you like your egg yolks. For runny yolks, aim for the shorter end (around 10-12 minutes) – the egg whites should be completely set, but the yolk should still jiggle slightly. For firmer yolks, bake closer to 15 minutes or slightly longer. Keep a close eye on them during the last few minutes to prevent overcooking.
- Rest and Serve: Once the eggs are cooked to your liking, carefully remove the muffin tin from the oven. Let the crispy hash brown and egg nests rest in the tin for a minute or two – this makes them easier to remove. Use a small offset spatula or a butter knife to gently loosen the edges of each nest and lift them out. Garnish with chopped fresh chives, parsley, or extra cheese if desired. Serve immediately while hot and crispy.
Nutrition
- Serving Size: one normal portion
- Calories: 350
- Fat: 25g
- Carbohydrates: 25g
- Protein: 12g


