")

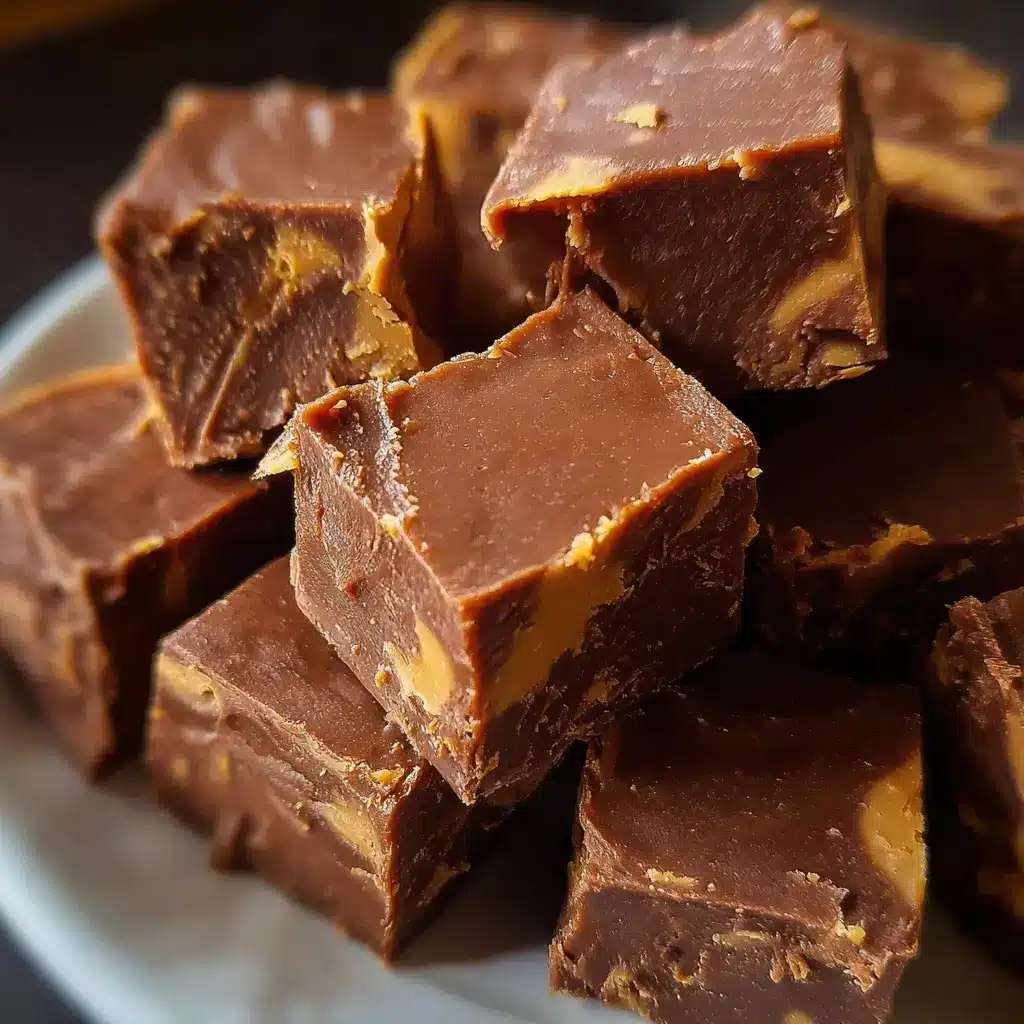

Let me tell you about the recipe that has officially become my emergency dessert, my go-to potluck contribution, and the one treat my entire family requests on a weekly basis. This Instant Chocolate Peanut Butter Fudge is, without exaggeration, a miracle worker. I remember the first time I made it. We had friends spontaneously decide to come over in an hour, and my pantry was looking sparse. I had no time to bake, no fancy ingredients, and a rising sense of panic. Then, I remembered a scribbled note from my grandmother’s recipe box. It was this fudge. In less than ten minutes of active work, I had a pan of rich, decadent fudge chilling in the fridge. When our friends arrived, I brought out a plate of perfectly cut, glossy squares. The room went quiet, followed by a chorus of “You have to give me this recipe!” They couldn’t believe it was made in the microwave with just a handful of simple ingredients. It’s so velvety and smooth, with that perfect, soul-satisfying balance of deep chocolate and creamy, salty peanut butter. It’s not grainy or overly sweet like some store-bought versions; it’s pure, homemade perfection. Now, it’s a staple for movie nights, a treasured addition to holiday cookie platters, and the best way to turn a regular Tuesday into a special occasion.
Ingredients
This recipe relies on the magic of a few high-quality, simple ingredients coming together to create something truly special. There’s no complex candy-making involved, just pure, straightforward deliciousness. Each component plays a crucial role in achieving that perfect, melt-in-your-mouth texture and rich flavor profile that defines this unforgettable fudge.
- 1 (14-ounce) can Sweetened Condensed Milk: This is the non-negotiable heart of the recipe. It provides the sugar, dairy, and structure that allows the fudge to set without cooking it for hours. It’s what makes the fudge incredibly smooth and creamy. Be absolutely sure you are using sweetened condensed milk, not evaporated milk, as they are not interchangeable and your fudge will not set properly with the latter. The thick, syrupy consistency is key.
- 2 cups (12 ounces) Semi-Sweet Chocolate Chips: The quality of your chocolate will directly impact the final flavor of your fudge. Using a good quality brand of semi-sweet chocolate chips will provide a deep, rich chocolate flavor that isn’t overly sweet, which is essential to balance the sweetness of the condensed milk and the saltiness of the peanut butter. You could also use a chopped semi-sweet chocolate bar for an even smoother melt.
- 1 cup Creamy Peanut Butter: This is where the other half of the iconic flavor duo comes in. For the smoothest, most consistent fudge, it’s best to use a standard commercial creamy peanut butter like Jif, Skippy, or a store-brand equivalent. These “no-stir” varieties contain emulsifiers that prevent the oil from separating, which ensures your fudge sets up perfectly smooth and not oily. While natural peanut butter is delicious, its tendency for oil separation can sometimes lead to a greasy or grainy final product in this specific recipe.
- 1 tablespoon Unsalted Butter: Just a small amount of butter adds an extra layer of richness and a beautiful, glossy sheen to the finished fudge. It also contributes to the soft, velvety texture, making each bite feel even more decadent. Using unsalted butter allows you to control the final salt level of the fudge.
- 1 teaspoon Vanilla Extract: Vanilla is a flavor enhancer. It won’t make your fudge taste like vanilla, but it will deepen and round out the chocolate and peanut butter flavors, making them taste more complex and pronounced. A pure vanilla extract will give you the best and most authentic flavor.
- ¼ teaspoon Salt: A tiny pinch of salt might seem counterintuitive in a sweet recipe, but it is absolutely essential. Salt is a flavor miracle worker; it tames the overall sweetness and makes the chocolate and peanut butter flavors pop. It creates a more dynamic and less one-note taste experience. If you only have salted butter, you can reduce or omit this extra salt.
Instructions
The beauty of this recipe lies in its sheer simplicity. These steps will guide you through the quick process of creating this decadent fudge using your microwave. The key is to work efficiently once the ingredients are melted, as the fudge will begin to set relatively quickly.
- Prepare Your Pan: Before you begin melting anything, prepare your baking pan. Take an 8×8 inch square baking pan and line it with parchment paper, leaving some overhang on at least two sides. This overhang will act as “handles,” allowing you to easily lift the entire block of fudge out of the pan for clean, easy cutting later. You can lightly grease the pan before adding the parchment to help it stick in place. Set the prepared pan aside.
- Combine and Melt: In a large, microwave-safe bowl, combine the semi-sweet chocolate chips, sweetened condensed milk, and the tablespoon of butter. It’s important to use a bowl that is large enough to allow for vigorous stirring without making a mess.
- Microwave in Intervals: Place the bowl in the microwave and heat on high power for 60 seconds. Remove the bowl—it will be hot, so use oven mitts—and stir the mixture well with a sturdy spatula. The chocolate chips will not be fully melted at this point, but stirring helps to distribute the heat evenly.
- Continue Melting and Stirring: Return the bowl to the microwave and continue to heat in 30-second intervals, stirring thoroughly after each interval. This interval method is crucial. It prevents the chocolate from overheating and “seizing,” which would result in a grainy, ruined texture. Continue this process until the chocolate is completely melted and the mixture is smooth and glossy. This should take a total of 2 to 3 minutes, depending on the power of your microwave.
- Incorporate Final Ingredients: Once the chocolate mixture is perfectly smooth, remove it from the microwave for the last time. Immediately add the cup of creamy peanut butter, the teaspoon of vanilla extract, and the ¼ teaspoon of salt.
- Stir to Perfection: Stir vigorously with your spatula until the peanut butter is completely melted and incorporated into the chocolate mixture. The fudge will become very thick, uniform in color, and have a beautiful sheen. You need to work fairly quickly at this stage as the fudge will begin to firm up as it cools.
- Transfer to Pan: Scrape the thick fudge mixture from the bowl into your prepared 8×8 inch pan. Use your spatula to spread it evenly into the corners, creating a smooth, level top.
- Chill Until Firm: Place the pan in the refrigerator. Let it chill for at least 2-3 hours, or until it is completely firm to the touch. The fudge needs this time to set properly so it can be cut into clean squares. For best results, you can let it chill for up to 4 hours or even overnight.
- Cut and Serve: Once the fudge is fully chilled and firm, grasp the parchment paper handles and lift the entire block of fudge out of the pan onto a cutting board. Use a large, sharp knife to cut the fudge into small squares. For extra clean cuts, you can run the knife under hot water and wipe it dry between each slice.
Nutrition Facts
This is an indulgent dessert, designed for rich flavor and enjoyment. The nutritional values reflect a treat best enjoyed in moderation. The recipe makes approximately 36 small squares.
- Servings: 36 squares
- Calories per serving: Approximately 120 kcal
- Fat: This fudge is rich in fats, primarily from the peanut butter and chocolate, which contribute to its creamy texture and satisfying nature.
- Carbohydrates: The main source of energy in this fudge, coming from the sugar in the sweetened condensed milk and chocolate chips.
- Protein: The peanut butter provides a modest amount of protein, adding to the nutritional substance of each square.
Preparation Time
One of the most appealing aspects of this recipe is how incredibly fast it is to prepare. It’s the perfect solution for when you need a stunning dessert without spending hours in the kitchen.
- Active Preparation Time: 10 minutes. This includes gathering your ingredients, preparing the pan, and the microwave and mixing process.
- Chilling Time: 2-3 hours. This is the passive time where the refrigerator does all the work, firming up the fudge to its perfect, sliceable consistency.
How to Serve
This chocolate peanut butter fudge is wonderfully versatile. While simply cutting it into squares is a classic approach, here are some creative and elegant ways to serve it.
- The Classic Dessert Platter:
- Arrange the fudge squares on a beautiful platter or wooden board.
- Garnish with a sprinkle of flaky sea salt, crushed peanuts, or mini chocolate chips to add texture and visual appeal.
- Serve alongside a hot cup of coffee or a cold glass of milk for the perfect pairing.
- As a Thoughtful Homemade Gift:
- Line a decorative tin or a small gift box with festive wax paper.
- Carefully arrange the fudge squares inside, separating layers with more wax paper if needed.
- Tie the box with a beautiful ribbon and add a handmade tag. It’s an ideal gift for holidays, birthdays, or as a thank-you gesture.
- The Ultimate Ice Cream Topping:
- Cut the fudge into smaller, bite-sized pieces.
- Gently warm them for a few seconds in the microwave until slightly softened (do not melt completely).
- Spoon the warm, gooey fudge pieces over a bowl of vanilla bean or coffee ice cream for an unbelievably decadent sundae experience.
- Incorporated into Other Desserts:
- Crumble a few squares of fudge and use them as a rich, chewy mix-in for brownie or cookie batter.
- Use small pieces as a surprise filling inside cupcakes before baking.
- Create a trifle by layering cubed fudge with whipped cream and chocolate pudding.
- For a Fancy Affair:
- Use small, shaped cookie cutters (like hearts or stars) to cut the fudge just after lifting it from the pan, before it’s fully hardened at room temperature.
- Arrange these elegant shapes on a tiered dessert stand for a party or special event.
Additional Tips
To ensure your fudge turns out perfectly every single time, here are eight essential tips to guide you through the process and allow for creative variations.
- The Importance of Quality Ingredients: The simplicity of this recipe means the flavor of each ingredient shines through. Using a high-quality semi-sweet chocolate (like Ghirardelli or Guittard) and pure vanilla extract will elevate your fudge from good to absolutely divine. The difference in flavor is noticeable.
- Master the Art of the Clean Cut: For picture-perfect, professional-looking squares, the cutting technique matters. After lifting the chilled fudge block from the pan, use a long, thin, sharp knife. Run the blade under hot tap water for about 10 seconds, then quickly wipe it completely dry with a paper towel. The hot, dry blade will slice through the fudge like butter. Repeat this process of heating and drying the knife between each and every cut for the cleanest edges.
- Don’t Overheat the Chocolate: This is the single most critical rule for microwave fudge. Heating the chocolate too quickly or for too long will cause it to “seize”—it will become a thick, grainy, and oily mess that cannot be saved. The 30-second intervals are your best friend. Stirring well after each interval distributes the heat and ensures a gentle, even melt. Stop heating as soon as the mixture is smooth.
- Embrace Variations and Mix-ins: This base recipe is a fantastic canvas for your creativity. After you’ve stirred in the peanut butter and vanilla, you can fold in up to a cup of mix-ins. Some great ideas include mini marshmallows, chopped pretzels for a salty crunch, chopped peanuts or pecans, or toffee bits. You could even swirl in a bit of marshmallow fluff on top before chilling for a “fluffernutter” version.
- Line Your Pan Without Fail: Do not skip the step of lining your pan with parchment paper with an overhang. Trying to dig fudge out of an unlined pan is a frustrating, messy ordeal that will ruin the look of your squares. The parchment “handles” are a game-changer that makes the process effortless.
- Try a Peanut Butter Swirl: For a more dramatic presentation, you can create a beautiful swirl effect. Prepare the chocolate fudge base as directed, but don’t mix in the full cup of peanut butter. Instead, mix in only half a cup. Pour the chocolate mixture into the pan. Then, gently warm the remaining half-cup of peanut butter in the microwave for 15-20 seconds to make it more pourable. Dollop it over the top of the fudge and use a knife or a skewer to gently drag through the dollops, creating elegant swirls before chilling.
- Making a Stovetop Version: If you don’t have a microwave or prefer the stovetop method, this recipe is easily adaptable. Use a heavy-bottomed saucepan or a double boiler. Combine the chocolate chips, sweetened condensed milk, and butter over low heat. Stir constantly to prevent scorching until the mixture is completely melted and smooth. Remove from the heat and proceed with the recipe as written, stirring in the peanut butter, vanilla, and salt.
- Proper Storage is Key: To keep your fudge fresh and delicious, store it in an airtight container. It can be kept at room temperature for up to one week, though its texture will be softer. For a firmer fudge and longer shelf life, store it in the refrigerator for up to three weeks. For the best flavor and texture, let refrigerated fudge sit at room temperature for 10-15 minutes before serving.
FAQ Section
Here are answers to some of the most common questions about making this Instant Chocolate Peanut Butter Fudge, helping you troubleshoot any potential issues and perfect your technique.
1. Why did my fudge turn out grainy or gritty?
A grainy texture is almost always caused by overheating the chocolate. When chocolate gets too hot too fast, the cocoa solids and fat separate, a process called “seizing.” This is why using short, 30-second intervals in the microwave and stirring thoroughly in between is so crucial. Always stop heating the moment the mixture becomes smooth and glossy.
2. My fudge seems oily on top. What went wrong?
An oily surface can be caused by a couple of factors. The first is, again, overheating the chocolate. The second common culprit is using natural peanut butter. Natural peanut butters have oil that separates naturally. While delicious, this separated oil can leach out during the setting process, creating a greasy layer. For this no-fail recipe, a standard commercial, no-stir peanut butter is your best bet for a perfect texture.
3. Why isn’t my fudge setting in the refrigerator?
This is a very rare problem with this recipe, and it almost always comes down to one ingredient error: using evaporated milk instead of sweetened condensed milk. Evaporated milk has the consistency of regular milk and contains no sugar. Sweetened condensed milk is very thick, syrupy, and high in sugar, which is what allows the fudge to set to a firm consistency. Double-check your can to ensure you’ve used the correct one.
4. Can I freeze this fudge for later?
Absolutely! This fudge freezes beautifully. To freeze, cut it into squares first. Then, wrap the entire block of squares tightly in plastic wrap, and then again in aluminum foil, or place the tightly wrapped block in a freezer-safe zip-top bag. This double-wrapping prevents freezer burn. It can be frozen for up to 3 months. To thaw, simply transfer it to the refrigerator overnight.
5. Can I use a different kind of chocolate?
Yes, you can experiment with other types of chocolate. Milk chocolate chips will result in a sweeter, creamier fudge. Dark chocolate chips (60% cacao or higher) will create a deeper, more intense, and less sweet fudge. You can even use white chocolate chips, but you may want to pair it with a different mix-in, as white chocolate and peanut butter can be very sweet together.
6. I’m allergic to peanuts. Can I use a different nut butter?
Yes, you can substitute the peanut butter with an equal amount of another creamy nut or seed butter. Creamy almond butter works wonderfully for a different flavor profile. For a nut-free version, creamy sunflower seed butter (SunButter) is an excellent substitute that pairs well with chocolate. Just ensure whichever butter you use is the “no-stir” variety for the best texture.
7. Can I double this recipe?
Yes, you can easily double this recipe. Use a 9×13 inch pan instead of an 8×8 inch pan. When melting the ingredients in the microwave, you will need to increase the heating time slightly. Start with a 90-second interval, then proceed with 30-second intervals, stirring in between, until everything is melted and smooth. The chilling time will remain the same.
8. Is it possible to make this recipe with less sugar?
Unfortunately, reducing the sugar in this specific recipe is difficult because the sweetened condensed milk is the structural foundation. Its high sugar content is what causes the fudge to set properly. Attempting to use a low-sugar or alternative version would fundamentally change the chemistry and likely result in fudge that doesn’t set. This recipe is best enjoyed as the rich, decadent treat it’s intended to be.

Instant Chocolate Peanut Butter Fudge
Ingredients
This recipe relies on the magic of a few high-quality, simple ingredients coming together to create something truly special. There’s no complex candy-making involved, just pure, straightforward deliciousness. Each component plays a crucial role in achieving that perfect, melt-in-your-mouth texture and rich flavor profile that defines this unforgettable fudge.
- 1 (14-ounce) can Sweetened Condensed Milk: This is the non-negotiable heart of the recipe. It provides the sugar, dairy, and structure that allows the fudge to set without cooking it for hours. It’s what makes the fudge incredibly smooth and creamy. Be absolutely sure you are using sweetened condensed milk, not evaporated milk, as they are not interchangeable and your fudge will not set properly with the latter. The thick, syrupy consistency is key.
- 2 cups (12 ounces) Semi-Sweet Chocolate Chips: The quality of your chocolate will directly impact the final flavor of your fudge. Using a good quality brand of semi-sweet chocolate chips will provide a deep, rich chocolate flavor that isn’t overly sweet, which is essential to balance the sweetness of the condensed milk and the saltiness of the peanut butter. You could also use a chopped semi-sweet chocolate bar for an even smoother melt.
- 1 cup Creamy Peanut Butter: This is where the other half of the iconic flavor duo comes in. For the smoothest, most consistent fudge, it’s best to use a standard commercial creamy peanut butter like Jif, Skippy, or a store-brand equivalent. These “no-stir” varieties contain emulsifiers that prevent the oil from separating, which ensures your fudge sets up perfectly smooth and not oily. While natural peanut butter is delicious, its tendency for oil separation can sometimes lead to a greasy or grainy final product in this specific recipe.
- 1 tablespoon Unsalted Butter: Just a small amount of butter adds an extra layer of richness and a beautiful, glossy sheen to the finished fudge. It also contributes to the soft, velvety texture, making each bite feel even more decadent. Using unsalted butter allows you to control the final salt level of the fudge.
- 1 teaspoon Vanilla Extract: Vanilla is a flavor enhancer. It won’t make your fudge taste like vanilla, but it will deepen and round out the chocolate and peanut butter flavors, making them taste more complex and pronounced. A pure vanilla extract will give you the best and most authentic flavor.
- ¼ teaspoon Salt: A tiny pinch of salt might seem counterintuitive in a sweet recipe, but it is absolutely essential. Salt is a flavor miracle worker; it tames the overall sweetness and makes the chocolate and peanut butter flavors pop. It creates a more dynamic and less one-note taste experience. If you only have salted butter, you can reduce or omit this extra salt.
Instructions
The beauty of this recipe lies in its sheer simplicity. These steps will guide you through the quick process of creating this decadent fudge using your microwave. The key is to work efficiently once the ingredients are melted, as the fudge will begin to set relatively quickly.
- Prepare Your Pan: Before you begin melting anything, prepare your baking pan. Take an 8×8 inch square baking pan and line it with parchment paper, leaving some overhang on at least two sides. This overhang will act as “handles,” allowing you to easily lift the entire block of fudge out of the pan for clean, easy cutting later. You can lightly grease the pan before adding the parchment to help it stick in place. Set the prepared pan aside.
- Combine and Melt: In a large, microwave-safe bowl, combine the semi-sweet chocolate chips, sweetened condensed milk, and the tablespoon of butter. It’s important to use a bowl that is large enough to allow for vigorous stirring without making a mess.
- Microwave in Intervals: Place the bowl in the microwave and heat on high power for 60 seconds. Remove the bowl—it will be hot, so use oven mitts—and stir the mixture well with a sturdy spatula. The chocolate chips will not be fully melted at this point, but stirring helps to distribute the heat evenly.
- Continue Melting and Stirring: Return the bowl to the microwave and continue to heat in 30-second intervals, stirring thoroughly after each interval. This interval method is crucial. It prevents the chocolate from overheating and “seizing,” which would result in a grainy, ruined texture. Continue this process until the chocolate is completely melted and the mixture is smooth and glossy. This should take a total of 2 to 3 minutes, depending on the power of your microwave.
- Incorporate Final Ingredients: Once the chocolate mixture is perfectly smooth, remove it from the microwave for the last time. Immediately add the cup of creamy peanut butter, the teaspoon of vanilla extract, and the ¼ teaspoon of salt.
- Stir to Perfection: Stir vigorously with your spatula until the peanut butter is completely melted and incorporated into the chocolate mixture. The fudge will become very thick, uniform in color, and have a beautiful sheen. You need to work fairly quickly at this stage as the fudge will begin to firm up as it cools.
- Transfer to Pan: Scrape the thick fudge mixture from the bowl into your prepared 8×8 inch pan. Use your spatula to spread it evenly into the corners, creating a smooth, level top.
- Chill Until Firm: Place the pan in the refrigerator. Let it chill for at least 2-3 hours, or until it is completely firm to the touch. The fudge needs this time to set properly so it can be cut into clean squares. For best results, you can let it chill for up to 4 hours or even overnight.
- Cut and Serve: Once the fudge is fully chilled and firm, grasp the parchment paper handles and lift the entire block of fudge out of the pan onto a cutting board. Use a large, sharp knife to cut the fudge into small squares. For extra clean cuts, you can run the knife under hot water and wipe it dry between each slice.
Nutrition
- Serving Size: one normal portion
- Calories: 120


