")

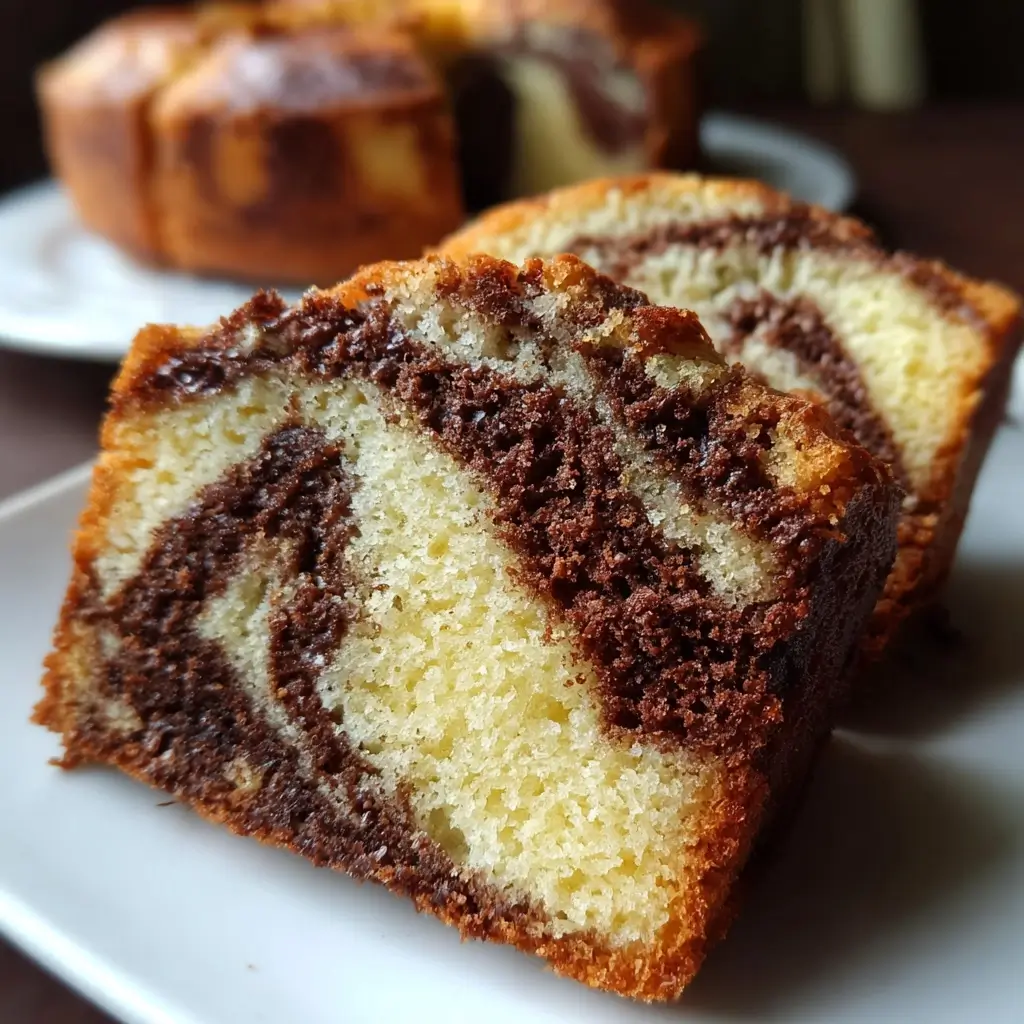

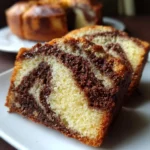
Of all the cakes that bring a wave of nostalgia, the marble cake stands in a league of its own. I still remember the first time my grandmother let me help her in the kitchen; I was a small child, mesmerized by the magic of two distinct batters, one light and one dark, coming together to create a beautiful, edible work of art. For years, I tried to replicate that cake from memory, often ending up with a dry, crumbly dessert that was a pale imitation of the one I held so dear. This recipe, however, is the culmination of all those trials and errors. This is the one. The first time I baked this version and sliced into it, revealing the perfect, delicate swirls and feeling the knife glide through the incredibly tender crumb, I knew I had finally found it. My family now requests this “famous” moist marble cake for birthdays, potlucks, and sometimes, just for a Tuesday. It’s a cake that’s simple enough for a beginner but delivers a result so stunningly delicious and moist that it will impress even the most seasoned baker. It’s the perfect balance of buttery, aromatic vanilla and rich, deep chocolate, a harmonious duet of flavors that dance on your palate. This isn’t just a recipe; it’s a guaranteed success, a centerpiece for your table, and a future family heirloom.
Ingredients
- 2 ½ cups (300g) All-Purpose Flour: The structural foundation of our cake. Using all-purpose flour provides the perfect balance of tenderness and strength, ensuring the cake holds its shape while remaining soft.
- 1 ½ cups (300g) Granulated Sugar: This is our primary sweetener, but it also plays a crucial role in the texture, helping to create a tender crumb by incorporating air when creamed with butter.
- 1 cup (226g) Unsalted Butter, at room temperature: The key to a rich, flavorful, and moist cake. Using unsalted butter allows you to control the salt content, and having it at room temperature is non-negotiable for proper creaming.
- 4 large Eggs, at room temperature: Eggs provide structure, richness, and leavening. Room temperature eggs will incorporate more easily into the batter, creating a smoother, more uniform texture.
- 1 cup (240ml) Buttermilk, at room temperature: This is the secret weapon for an unbelievably moist cake. The acidity in buttermilk tenderizes the gluten in the flour, resulting in a super soft crumb.
- 2 teaspoons Baking Powder: A crucial leavening agent that gives the cake its lift and light, airy texture.
- ½ teaspoon Baking Soda: Works in conjunction with the acidic buttermilk to provide additional lift and tenderness.
- ½ teaspoon Salt: A small amount of salt is essential to balance the sweetness and enhance all the other flavors in the cake.
- 2 teaspoons Pure Vanilla Extract: The heart of our vanilla batter. Use a high-quality pure vanilla extract for the best, most aromatic flavor.
- ⅓ cup (30g) Unsweetened Dutch-Processed Cocoa Powder: For a deep, rich, and smooth chocolate flavor without any bitterness. Dutch-processing neutralizes the acidity for a milder taste and darker color.
- 3 tablespoons (45ml) Hot Coffee or Hot Water: This is used to “bloom” the cocoa powder, which intensifies the chocolate flavor and ensures it mixes smoothly into the batter without creating lumps.
Instructions
- Preparation and Preheating: Begin by preheating your oven to 350°F (175°C). Thoroughly grease and flour a 10-cup bundt pan or a 9×5 inch loaf pan. This two-step process of greasing (with butter or baking spray) and then lightly dusting with flour creates a non-stick barrier that is essential for ensuring your beautifully swirled cake releases from the pan cleanly and without breaking. Set the prepared pan aside.
- Combine Dry Ingredients: In a medium-sized mixing bowl, whisk together the 2 ½ cups of all-purpose flour, 2 teaspoons of baking powder, ½ teaspoon of baking soda, and ½ teaspoon of salt. Sifting these ingredients together is highly recommended. This step not only removes any potential lumps but also aerates the flour, which contributes to a lighter, more tender final cake texture.
- Cream Butter and Sugar: In the large bowl of a stand mixer fitted with the paddle attachment, or in a large bowl with a hand mixer, beat the 1 cup of room temperature unsalted butter on medium speed until it is smooth and creamy. Gradually add the 1 ½ cups of granulated sugar and continue to beat on medium-high speed for a full 3-5 minutes. The mixture should become pale, light, and very fluffy. This creaming process is vital; it incorporates thousands of tiny air bubbles into the butter and sugar, which will later expand in the oven and act as a primary leavener for the cake.
- Incorporate Eggs and Vanilla: Reduce the mixer speed to medium-low. Add the 4 room temperature eggs one at a time, making sure each egg is fully incorporated into the batter before adding the next. Scrape down the sides and bottom of the bowl with a spatula after adding the last egg to ensure everything is well combined. Mix in the 2 teaspoons of pure vanilla extract.
- Alternate Wet and Dry Ingredients: With the mixer on its lowest speed, begin adding the dry ingredient mixture and the buttermilk. Add approximately one-third of the dry ingredients, followed by half of the buttermilk. Repeat this process, ending with the final third of the dry ingredients. Mix only until the last streaks of flour have just disappeared. It is crucial not to overmix at this stage, as doing so can develop the gluten in the flour and lead to a tough, dense cake.
- Divide and Flavor the Batter: Remove the bowl from the mixer. Measure out approximately half of the vanilla batter (about 3 cups) and transfer it to a separate medium bowl. In a small bowl, whisk together the ⅓ cup of cocoa powder and the 3 tablespoons of hot coffee or water until a smooth, thick paste forms. Add this chocolate paste to one of the bowls of batter and gently fold it in with a spatula until it is evenly combined and no streaks remain. You now have one bowl of vanilla batter and one bowl of chocolate batter.
- Create the Marble Effect: Spoon the batters into your prepared pan, alternating between large dollops of the vanilla and chocolate batters. You can place them side by side or layer them on top of each other. Once all the batter is in the pan, insert a butter knife or a wooden skewer straight down into the batter. Gently drag the knife through the batter in a “figure-eight” or “S” motion 2-3 times around the pan. Be very careful not to overmix; the goal is to create distinct swirls, not to blend the two colors into a uniform light brown. Two or three passes are all you need for a beautiful marble pattern.
- Bake to Perfection: Place the pan in the preheated oven on the center rack. Bake for 45-55 minutes for a bundt pan, or 60-70 minutes for a loaf pan. The cake is done when it is golden brown, the sides are pulling away from the pan, and a wooden skewer or toothpick inserted into the center comes out clean or with a few moist crumbs attached (but no wet batter).
- Cooling the Cake: Once baked, remove the cake from the oven and place it on a wire cooling rack. Let the cake cool completely in the pan for at least 15-20 minutes. This allows the cake to set and firm up, preventing it from breaking when you invert it. After the initial cooling period, carefully invert the pan onto the wire rack to release the cake. Allow the cake to cool completely to room temperature before slicing and serving. This final cooling step is important for the texture to fully set.
Nutrition Facts
- Servings: 12-16 slices
- Calories per serving: Approximately 350-400 kcal
- Fat: A primary source of the cake’s rich flavor and moist texture, derived mainly from the butter and eggs.
- Carbohydrates: Provide the energy and structure of the cake, coming from the flour and sugar.
- Protein: Contributed by the eggs and flour, protein is essential for the cake’s structure and crumb.
- Sugar: Responsible for the cake’s sweetness and contributes to its tender texture and browning.
- Sodium: Comes from the salt and leavening agents, acting as a crucial flavor enhancer that balances the overall taste profile.
Preparation Time
This recipe is wonderfully straightforward and manageable. Expect an active preparation time of about 20-25 minutes, which includes measuring your ingredients, mixing the batters, and creating the marble effect. The passive time includes a baking time of 45-70 minutes (depending on the pan) and a cooling time of at least 1 hour before the cake is ready to be sliced and enjoyed.
How to Serve
This moist marble cake is a star on its own, but it can be dressed up in numerous ways to suit any occasion. Here are some delightful serving suggestions:
- The Classic Dusting:
- For a simple, elegant finish, let the cake cool completely and dust it lightly with powdered sugar using a fine-mesh sieve. It highlights the beautiful shape of a bundt cake without overpowering its flavor.
- A Simple Glaze:
- Vanilla Glaze: Whisk together 1 cup of powdered sugar with 2-3 tablespoons of milk and ½ teaspoon of vanilla extract until smooth. Drizzle over the cooled cake.
- Chocolate Glaze: Melt 4 ounces of semi-sweet chocolate with 2 tablespoons of butter. Stir until smooth and drizzle over the top.
- Decadent Frostings:
- Chocolate Ganache: For a truly luxurious experience, pour a warm chocolate ganache over the cooled cake, letting it drip down the sides.
- Vanilla Buttercream: A fluffy American or Swiss meringue buttercream pairs beautifully with the buttery notes of the cake.
- À La Mode:
- Serve a warm slice of the marble cake with a scoop of high-quality ice cream.
- Classic Pairing: Vanilla bean ice cream.
- Rich Pairing: A deep chocolate or coffee-flavored ice cream.
- With Fruits and Sauces:
- Serve alongside a bowl of fresh, seasonal berries like raspberries, strawberries, or blueberries.
- Drizzle the plate with a vibrant raspberry coulis or a rich caramel sauce for a restaurant-quality presentation.
- Perfect Drink Pairings:
- For Breakfast or Brunch: A hot cup of freshly brewed coffee or a latte.
- For an Afternoon Treat: A classic black tea, Earl Grey, or a simple glass of cold milk.
- For Dessert: A small glass of dessert wine, such as a Port or a sweet Riesling.
Additional Tips
- Room Temperature is Non-Negotiable: This tip cannot be stressed enough. Using room temperature butter, eggs, and buttermilk is the most critical step for a smooth, emulsified batter. Cold ingredients do not combine properly, which can result in a dense, greasy, or curdled batter. Plan ahead and take your ingredients out of the refrigerator at least an hour before you begin baking.
- Measure Your Flour Correctly: How you measure flour can drastically change the outcome of your cake. Do not scoop the flour directly out of the bag with your measuring cup, as this compacts it and you’ll end up with too much. Instead, use the “spoon and level” method: use a spoon to fluff up the flour in its container, then spoon it into your measuring cup until it’s overflowing. Use the back of a knife to level off the top. This guarantees a much more accurate measurement and a lighter cake.
- The Art of Not Overmixing: Overmixing is the number one enemy of a tender cake. Once you begin adding the dry ingredients to the wet, you are developing gluten. The more you mix, the more gluten develops, leading to a tough, chewy, and dry cake. Mix only until the flour is just combined. It’s better to have a few tiny streaks of flour left and finish incorporating by hand with a spatula than to risk over-beating the batter.
- Master the Marble, Don’t Muddle It: The key to a beautiful marble cake is restraint. When you swirl the batters together with a knife or skewer, you are aiming for distinct ribbons of chocolate and vanilla, not a homogenous, light-brown cake. Two to three gentle passes through the batter in a figure-eight pattern are all you need. Any more than that and the colors will become muddled and the visual appeal will be lost.
- Bloom Your Cocoa for Intense Flavor: Mixing cocoa powder with a small amount of hot liquid (like the coffee or water in this recipe) is a technique called “blooming.” This simple step releases the cocoa’s flavor particles, resulting in a much deeper, richer, and more intense chocolate flavor in your cake. It also dissolves the powder, ensuring a smooth chocolate batter without any dry clumps.
- Know Your Oven’s Personality: All ovens are different, and the temperature on the dial isn’t always accurate. An inexpensive oven thermometer can be a baker’s best friend. It will tell you the true temperature inside your oven, so you can adjust accordingly and avoid the common pitfalls of over-baking (dry cake) or under-baking (sunken, gummy cake).
- Easy Buttermilk Substitute: If you don’t have buttermilk on hand, don’t rush to the store! You can easily make a substitute at home. For every 1 cup of buttermilk needed, measure out 1 cup of regular milk and add 1 tablespoon of lemon juice or white vinegar to it. Stir and let it sit for 5-10 minutes. It will curdle slightly and be ready to use as a perfect replacement.
- Proper Storage for Lasting Freshness: To keep your marble cake moist for as long as possible, store it properly. Once completely cooled, place it in an airtight cake container or wrap it securely in plastic wrap. It will stay fresh at room temperature for up to 3-4 days. Avoid refrigerating it, as the cold air can dry out the cake’s crumb.
FAQ Section
1. Q: Why did my marble cake turn out dry?
A: Dryness in a marble cake is almost always due to one of three things: over-baking, inaccurate flour measurement, or overmixing. Use an oven thermometer to ensure your oven temperature is accurate and start checking for doneness a few minutes before the recipe suggests. Always use the “spoon and level” method for measuring flour to avoid adding too much. Finally, be very careful to mix the batter only until the ingredients are just combined, as overmixing develops gluten and creates a tough, dry texture.
2. Q: My chocolate and vanilla batters blended together into one color. What went wrong?
A: This is a classic case of over-swirling! It’s very tempting to keep mixing the batters in the pan to create what you think will be a more intricate pattern, but this actually has the opposite effect. To get those beautiful, distinct ribbons of color, you only need to run a knife or skewer through the batter two or three times. Any more than that and you risk muddling the colors into a single, light brown batter.
3. Q: Can I use a different type of pan, like two 8-inch round pans?
A: Absolutely! This recipe is versatile. If you want to make a layered marble cake, you can divide the batter between two greased and floured 8-inch or 9-inch round pans. The baking time will be shorter, likely around 30-35 minutes. Start checking for doneness at the 25-minute mark. You can also bake it in a 9×13 inch rectangular pan for a sheet cake, which would take approximately 35-40 minutes.
4. Q: Can I make this recipe gluten-free?
A: Yes, you can adapt this recipe for a gluten-free diet. The most reliable option is to use a high-quality “cup-for-cup” or “1-to-1” gluten-free all-purpose flour blend that already contains xanthan gum. Substitute it in equal amounts for the all-purpose flour. Be aware that the texture may be slightly different—sometimes a bit denser or more delicate—but it will still be a delicious cake.
5. Q: What is the best way to freeze this marble cake?
A: This cake freezes beautifully. First, ensure the cake is completely cool to room temperature. You can freeze it whole or in individual slices. For best results, wrap it tightly in a double layer of plastic wrap, followed by a layer of aluminum foil. This prevents freezer burn and locks in moisture. It can be frozen for up to 3 months. To thaw, simply leave it wrapped on the counter at room temperature for a few hours.
6. Q: My cake sank in the middle after I took it out of the oven. Why did that happen?
A: A sunken cake is usually caused by it being under-baked. The center of the cake did not have enough time for its structure to set, so it collapsed as it cooled. Always perform the toothpick test in the thickest part of the cake; it should come out clean or with a few moist crumbs, but never wet batter. Other potential culprits include opening the oven door too early or too frequently during baking (which causes a sudden drop in temperature) or using expired baking powder or soda that has lost its leavening power.
7. Q: Can I use oil instead of butter in this recipe?
A: While you technically can substitute oil for butter, it will significantly change the cake. Butter provides a rich, creamy flavor and contributes to a tender yet sturdy crumb through the creaming process. A cake made with oil will be very moist, but it will have a lighter, more “spongy” texture and will lack that distinctive buttery flavor. For this classic recipe, butter is highly recommended for the best results.
8. Q: What’s the difference between Dutch-processed and natural cocoa powder, and does it matter?
A: It does matter! Natural cocoa powder is acidic and has a sharp, intense chocolate flavor. Dutch-processed cocoa powder has been treated with an alkali to neutralize its acidity, resulting in a smoother, milder flavor and a darker, richer color. This recipe calls for Dutch-processed cocoa for that deep color and smooth taste. Because it also uses both baking powder and baking soda (which reacts with the acidic buttermilk), the choice is more about flavor and color, but for the best result, stick with Dutch-processed cocoa.
Moist Marble Cake Recipe
Ingredients
- 2 ½ cups (300g) All-Purpose Flour: The structural foundation of our cake. Using all-purpose flour provides the perfect balance of tenderness and strength, ensuring the cake holds its shape while remaining soft.
- 1 ½ cups (300g) Granulated Sugar: This is our primary sweetener, but it also plays a crucial role in the texture, helping to create a tender crumb by incorporating air when creamed with butter.
- 1 cup (226g) Unsalted Butter, at room temperature: The key to a rich, flavorful, and moist cake. Using unsalted butter allows you to control the salt content, and having it at room temperature is non-negotiable for proper creaming.
- 4 large Eggs, at room temperature: Eggs provide structure, richness, and leavening. Room temperature eggs will incorporate more easily into the batter, creating a smoother, more uniform texture.
- 1 cup (240ml) Buttermilk, at room temperature: This is the secret weapon for an unbelievably moist cake. The acidity in buttermilk tenderizes the gluten in the flour, resulting in a super soft crumb.
- 2 teaspoons Baking Powder: A crucial leavening agent that gives the cake its lift and light, airy texture.
- ½ teaspoon Baking Soda: Works in conjunction with the acidic buttermilk to provide additional lift and tenderness.
- ½ teaspoon Salt: A small amount of salt is essential to balance the sweetness and enhance all the other flavors in the cake.
- 2 teaspoons Pure Vanilla Extract: The heart of our vanilla batter. Use a high-quality pure vanilla extract for the best, most aromatic flavor.
- ⅓ cup (30g) Unsweetened Dutch-Processed Cocoa Powder: For a deep, rich, and smooth chocolate flavor without any bitterness. Dutch-processing neutralizes the acidity for a milder taste and darker color.
- 3 tablespoons (45ml) Hot Coffee or Hot Water: This is used to “bloom” the cocoa powder, which intensifies the chocolate flavor and ensures it mixes smoothly into the batter without creating lumps.
Instructions
- Preparation and Preheating: Begin by preheating your oven to 350°F (175°C). Thoroughly grease and flour a 10-cup bundt pan or a 9×5 inch loaf pan. This two-step process of greasing (with butter or baking spray) and then lightly dusting with flour creates a non-stick barrier that is essential for ensuring your beautifully swirled cake releases from the pan cleanly and without breaking. Set the prepared pan aside.
- Combine Dry Ingredients: In a medium-sized mixing bowl, whisk together the 2 ½ cups of all-purpose flour, 2 teaspoons of baking powder, ½ teaspoon of baking soda, and ½ teaspoon of salt. Sifting these ingredients together is highly recommended. This step not only removes any potential lumps but also aerates the flour, which contributes to a lighter, more tender final cake texture.
- Cream Butter and Sugar: In the large bowl of a stand mixer fitted with the paddle attachment, or in a large bowl with a hand mixer, beat the 1 cup of room temperature unsalted butter on medium speed until it is smooth and creamy. Gradually add the 1 ½ cups of granulated sugar and continue to beat on medium-high speed for a full 3-5 minutes. The mixture should become pale, light, and very fluffy. This creaming process is vital; it incorporates thousands of tiny air bubbles into the butter and sugar, which will later expand in the oven and act as a primary leavener for the cake.
- Incorporate Eggs and Vanilla: Reduce the mixer speed to medium-low. Add the 4 room temperature eggs one at a time, making sure each egg is fully incorporated into the batter before adding the next. Scrape down the sides and bottom of the bowl with a spatula after adding the last egg to ensure everything is well combined. Mix in the 2 teaspoons of pure vanilla extract.
- Alternate Wet and Dry Ingredients: With the mixer on its lowest speed, begin adding the dry ingredient mixture and the buttermilk. Add approximately one-third of the dry ingredients, followed by half of the buttermilk. Repeat this process, ending with the final third of the dry ingredients. Mix only until the last streaks of flour have just disappeared. It is crucial not to overmix at this stage, as doing so can develop the gluten in the flour and lead to a tough, dense cake.
- Divide and Flavor the Batter: Remove the bowl from the mixer. Measure out approximately half of the vanilla batter (about 3 cups) and transfer it to a separate medium bowl. In a small bowl, whisk together the ⅓ cup of cocoa powder and the 3 tablespoons of hot coffee or water until a smooth, thick paste forms. Add this chocolate paste to one of the bowls of batter and gently fold it in with a spatula until it is evenly combined and no streaks remain. You now have one bowl of vanilla batter and one bowl of chocolate batter.
- Create the Marble Effect: Spoon the batters into your prepared pan, alternating between large dollops of the vanilla and chocolate batters. You can place them side by side or layer them on top of each other. Once all the batter is in the pan, insert a butter knife or a wooden skewer straight down into the batter. Gently drag the knife through the batter in a “figure-eight” or “S” motion 2-3 times around the pan. Be very careful not to overmix; the goal is to create distinct swirls, not to blend the two colors into a uniform light brown. Two or three passes are all you need for a beautiful marble pattern.
- Bake to Perfection: Place the pan in the preheated oven on the center rack. Bake for 45-55 minutes for a bundt pan, or 60-70 minutes for a loaf pan. The cake is done when it is golden brown, the sides are pulling away from the pan, and a wooden skewer or toothpick inserted into the center comes out clean or with a few moist crumbs attached (but no wet batter).
- Cooling the Cake: Once baked, remove the cake from the oven and place it on a wire cooling rack. Let the cake cool completely in the pan for at least 15-20 minutes. This allows the cake to set and firm up, preventing it from breaking when you invert it. After the initial cooling period, carefully invert the pan onto the wire rack to release the cake. Allow the cake to cool completely to room temperature before slicing and serving. This final cooling step is important for the texture to fully set.
Nutrition
- Serving Size: one normal portion
- Calories: 400


