")

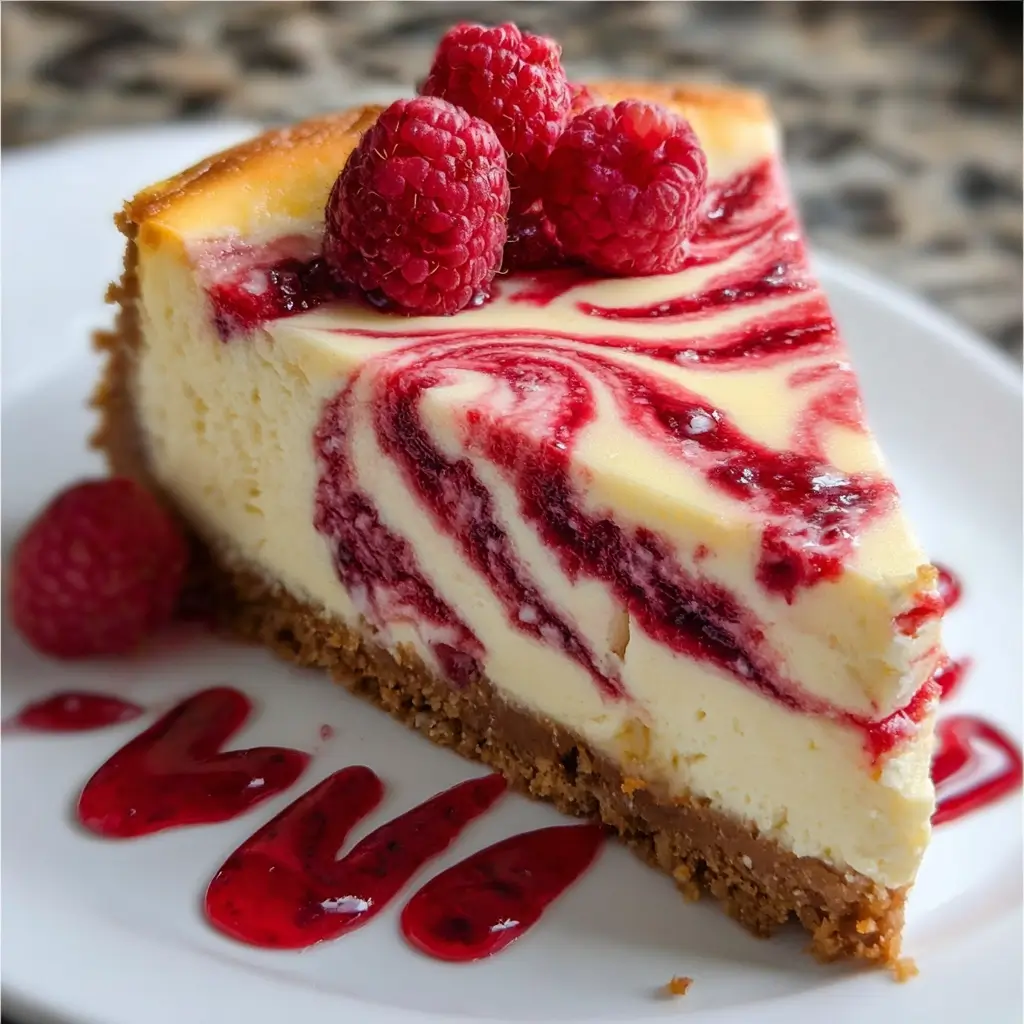

Of all the desserts that grace our family table, there are a few that cause an immediate, reverent silence. This Raspberry Swirl Cheesecake is the undisputed champion of that quiet admiration. I remember the first time I pulled it from the oven, its surface a pristine cream canvas, marbled with deep, jewel-toned red. The hardest part was the agonizing wait as it chilled, the anticipation building with every peek into the refrigerator. When I finally served it, the reaction was everything a home baker could hope for. My husband, usually a man of many words, simply closed his eyes and savored the first bite. The kids, who often favor chocolate over anything else, were mesmerized by the vibrant swirl and the perfect balance of tangy fruit and rich, sweet cream. It’s more than a recipe; it’s a showstopper, a celebration cake, and a guaranteed crowd-pleaser. The buttery graham cracker crust provides the perfect textural foundation for the impossibly smooth, dense, and velvety cheesecake filling. The raspberry swirl isn’t just for looks; it’s a bright, zesty ribbon of flavor that cuts through the richness, creating a perfectly harmonious dessert that is both decadent and refreshingly light. This is the recipe I turn to when I want to make an impression, and it has never, ever failed.
Ingredients
This recipe is divided into three core components: the classic crust, the vibrant raspberry swirl, and the luxuriously creamy cheesecake filling. Using high-quality, room-temperature ingredients is the secret to achieving a flawless texture.
For the Graham Cracker Crust:
- 1 ½ cups (150g) graham cracker crumbs: This is the foundation of your cheesecake. You can buy pre-made crumbs or make your own by pulsing about 10 full sheets of graham crackers in a food processor until they are the consistency of fine sand.
- ¼ cup (50g) granulated sugar: Adds a touch of sweetness to the crust, complementing the buttery and savory notes of the crackers.
- 6 tablespoons (85g) unsalted butter, melted: This is the binding agent that holds the crust together, creating a firm, sliceable base that won’t crumble apart.
For the Raspberry Swirl:
- 1 ½ cups (180g) fresh or frozen raspberries: The star of the show. Fresh raspberries will break down slightly faster, while frozen can be used directly from the freezer, as they will thaw and release their juices while cooking.
- ¼ cup (50g) granulated sugar: Balances the natural tartness of the raspberries, creating a sauce that is both sweet and tangy.
- 1 tablespoon (15ml) fresh lemon juice: Brightens the flavor of the raspberries and helps the sauce thicken slightly by activating the natural pectin in the fruit.
- 1 tablespoon (8g) cornstarch mixed with 1 tablespoon (15ml) cold water: This slurry is a crucial thickening agent, ensuring your swirl has enough body to hold its shape within the cheesecake batter and not simply sink to the bottom.
For the Cheesecake Filling:
- 32 ounces (904g) full-fat block cream cheese, softened to room temperature: This is the most important ingredient. It MUST be full-fat block cream cheese, not the whipped kind in a tub, and it absolutely must be at room temperature to ensure a lump-free, silky-smooth filling. Set it on the counter for at least 4-6 hours before you begin.
- 1 ⅓ cups (265g) granulated sugar: Provides the primary sweetness for the cheesecake, perfectly balancing the tang of the cream cheese and sour cream.
- 1 cup (240g) full-fat sour cream, at room temperature: Adds a delightful tangy flavor and contributes to the ultra-creamy, dense texture of a classic New York-style cheesecake. Room temperature is key to prevent a lumpy batter.
- 2 teaspoons pure vanilla extract: Enhances all the other flavors in the cheesecake, adding a warm, aromatic depth.
- ⅛ teaspoon salt: A tiny amount of salt is essential in sweet recipes to balance the sugar and bring out the complexity of the other ingredients.
- 4 large eggs, at room temperature: Eggs are the primary structure-builder in the cheesecake. Adding them one at a time and mixing minimally ensures the cheesecake bakes up evenly without becoming airy or souffle-like. Again, room temperature is non-negotiable for smooth incorporation.
Instructions
Follow these steps carefully for a perfect, crack-free cheesecake. The process is methodical but not difficult. The keys are patience, room temperature ingredients, and a slow, gentle cooling process.
Step 1: Prepare the Oven and Pan
Preheat your oven to 350°F (175°C). Prepare a 9-inch springform pan. To create a waterproof seal for the water bath, place a large sheet of heavy-duty aluminum foil on your counter, then another sheet on top of it, perpendicular to the first. Place your springform pan in the center and carefully wrap the foil up the sides of the pan, ensuring there are no tears. This will prevent any water from seeping into your crust.
Step 2: Make the Graham Cracker Crust
In a medium bowl, combine the graham cracker crumbs and granulated sugar. Pour in the melted butter and mix with a fork until all the crumbs are evenly moistened, resembling wet sand. Press the mixture firmly and evenly into the bottom and about one inch up the sides of your prepared springform pan. Use the flat bottom of a measuring cup or glass to pack it down tightly. Bake the crust for 10 minutes. Once baked, remove it from the oven and place it on a wire rack to cool completely while you prepare the filling. Once the crust is out, reduce the oven temperature to 325°F (163°C).
Step 3: Create the Raspberry Swirl Sauce
While the crust cools, make the raspberry sauce. In a small saucepan, combine the raspberries, granulated sugar, and lemon juice. Cook over medium heat, stirring occasionally and mashing the berries with the back of a spoon as they warm up. Bring the mixture to a simmer. In a small bowl, whisk together the cornstarch and cold water to create a smooth slurry. Pour the slurry into the simmering raspberry mixture and continue to cook, stirring constantly, for about 1-2 minutes, until the sauce has noticeably thickened. Remove from the heat. For a seedless sauce (highly recommended for a smoother texture), press the mixture through a fine-mesh sieve into a clean bowl, using a spatula to push all the pulp through. Discard the seeds. Set the sauce aside to cool to room temperature.
Step 4: Mix the Cheesecake Filling
In the large bowl of a stand mixer fitted with the paddle attachment, or in a large bowl with a hand mixer, beat the room temperature cream cheese on medium-low speed for about 2-3 minutes, until completely smooth and free of lumps. Scrape down the sides and bottom of the bowl frequently. Add the granulated sugar and salt, and beat on low speed until just combined and smooth. Be careful not to incorporate too much air. Add the room temperature sour cream and vanilla extract, and mix on low speed until fully incorporated. Scrape the bowl again. With the mixer on its lowest speed, add the room temperature eggs one at a time, mixing until each egg is just barely combined before adding the next. Stop mixing as soon as the last streak of yellow disappears. Over-mixing at this stage is the primary cause of cracks, as it incorporates too much air.
Step 5: Assemble and Swirl the Cheesecake
Pour half of the cheesecake batter into the cooled crust and spread it into an even layer. Dollop about half of the cooled raspberry sauce over the batter in random spoonfuls. Use a butter knife or a skewer to gently swirl the sauce into the batter, making a few figure-eight motions. Be careful not to over-mix or you’ll lose the distinct swirl pattern. Pour the remaining cheesecake batter on top, smoothing the surface gently with an offset spatula. Dollop the remaining raspberry sauce on top. Use your clean knife or skewer to create your final, beautiful swirl pattern on the surface of the cheesecake.
Step 6: Prepare the Water Bath and Bake
Bring a kettle or pot of water to a boil. Place your foil-wrapped springform pan into a large roasting pan. Carefully place the roasting pan on the oven rack. Pour the hot water into the roasting pan, being careful not to splash any into the cheesecake, until the water level reaches about halfway up the sides of the springform pan. The water bath (or bain-marie) creates a humid environment in the oven, which is essential for baking the cheesecake gently and evenly, preventing cracks and ensuring a creamy texture. Bake at 325°F (163°C) for 60-75 minutes. The cheesecake is done when the edges are set, but the center 2-3 inches still has a slight jiggle to it (like Jell-O). Do not overbake.
Step 7: The Crucial Cooling Process
This is the most critical step for preventing cracks. Turn the oven off completely, but do not open the oven door. Let the cheesecake cool in the closed oven for 1 hour. After 1 hour, crack the oven door open slightly (you can use a wooden spoon to prop it open) and let the cheesecake cool in the oven for another hour. This slow, gradual cooling process prevents the cheesecake from shocking and contracting too quickly, which is what causes surface cracks. After the second hour, remove the cheesecake from the roasting pan and water bath. Remove the foil wrapping. Let it cool completely on a wire rack at room temperature.
Step 8: Chill Thoroughly
Once the cheesecake has reached room temperature, loosely cover it with plastic wrap (don’t let the wrap touch the surface) and transfer it to the refrigerator. Chill for at least 6 hours, but preferably overnight. This final chilling period is non-negotiable; it allows the cheesecake to fully set, making it sliceable and developing its full, rich flavor and creamy texture. Do not rush this step!
Nutrition Facts
- Servings: 12-16 slices
- Calories per serving: Approximately 420-550 kcal (based on 12 slices)
- Fat: This is a rich dessert, with the majority of fat coming from the full-fat cream cheese and sour cream, which are essential for its signature creamy texture.
- Carbohydrates: The primary sources of carbohydrates are the sugar and the graham cracker crust, providing the energy and sweetness that define this classic dessert.
- Protein: The eggs and dairy in this recipe provide a moderate amount of protein, which helps to create the cheesecake’s firm, custard-like structure.
Preparation time
The total time for this recipe is significant, but most of it is hands-off. Proper planning is key.
- Active Preparation Time: Approximately 30-40 minutes. This includes making the crust, preparing the raspberry sauce, and mixing the filling.
- Baking Time: 60-75 minutes in the oven.
- Cooling and Chilling Time: Approximately 8-10 hours. This includes 2 hours of slow cooling in the oven, 1-2 hours of cooling at room temperature, and a minimum of 6 hours (preferably overnight) of chilling in the refrigerator. This time is crucial for the final texture and cannot be skipped.
How to Serve
Serving this Raspberry Swirl Cheesecake is an event in itself. Presentation can elevate it from a simple dessert to a stunning centerpiece.
- Temperature is Key: Always serve cheesecake chilled, directly from the refrigerator. The cold temperature maintains its firm, dense texture. If it sits out for too long, it can become overly soft.
- The Perfect Slice: For clean, beautiful slices, use a long, thin, sharp knife. Dip the knife in a tall glass of hot water, wipe it clean with a paper towel, and then make a single, decisive cut. Repeat the hot water and wipe process for every single slice. This prevents the filling from dragging and smearing.
- Garnishes and Toppings: While stunning on its own, a few simple garnishes can add a professional touch.
- Fresh Berries: A small pile of fresh raspberries in the center or a single raspberry on each slice adds a pop of color and freshness.
- Whipped Cream: A dollop or piped rosette of lightly sweetened, homemade whipped cream provides a light, airy contrast to the dense cheesecake.
- Mint Sprigs: A few fresh mint leaves placed next to the berries adds a touch of green and a hint of fresh aroma.
- Chocolate Shavings: For a more decadent twist, use a vegetable peeler to shave some white or dark chocolate over the top.
- Extra Sauce: Serve with a small pitcher of extra raspberry sauce on the side for guests who want an even more intense fruit flavor.
- Plating: Serve on a clean, white dessert plate to make the colors of the cheesecake pop. You can even drizzle a little of the extra raspberry sauce on the plate before placing the slice on top for an elegant, restaurant-style presentation.
Additional tips
Master the art of cheesecake making with these eight professional tips that address common issues and help ensure a perfect result every time.
- Room Temperature is Law: I cannot stress this enough. If your cream cheese, sour cream, and eggs are even slightly cool, your batter will be lumpy. It’s the number one rule for a silky-smooth cheesecake. Set your ingredients out on the counter at least 4 hours before you plan to start baking.
- Scrape, Scrape, Scrape: Throughout the mixing process, frequently stop the mixer and use a flexible spatula to scrape down the sides and bottom of the bowl, as well as the paddle attachment itself. This ensures every bit of the ingredients is evenly incorporated and prevents hidden lumps of cream cheese.
- The “No-Fear” Water Bath: Many bakers are intimidated by the water bath, but it’s the secret to a professional-quality cheesecake. Using heavy-duty foil and overlapping two large sheets is the best way to prevent leaks. Alternatively, you can place a 9×13 inch pan filled with boiling water on the rack below the cheesecake. It’s not quite as effective as a true water bath but is a great alternative if you’re worried about leaks.
- Don’t Over-Swirl: It’s tempting to keep swirling to create an intricate pattern, but resist the urge. A few simple, deliberate figure-eight motions are all you need. Over-swirling will muddy the colors, and you’ll lose the beautiful, distinct ribbon of raspberry. Less is more.
- Make It Ahead: Cheesecake is the perfect make-ahead dessert. In fact, its flavor and texture improve after a day or two in the refrigerator. This makes it ideal for holidays or dinner parties, as you can have dessert completely finished and ready to go well before your event.
- Freezing for the Future: This cheesecake freezes beautifully. After it has chilled completely overnight, you can freeze it whole or in individual slices. Wrap it tightly in two layers of plastic wrap and then a layer of aluminum foil. It will keep in the freezer for up to 2 months. To thaw, place it in the refrigerator overnight.
- Crust Variations: Feel free to get creative with the crust. You can substitute the graham crackers with an equal amount of finely crushed Biscoff cookies, Oreo cookies (scrape out the cream first), or shortbread cookies for a different flavor profile.
- Strain Your Sauce for Silkiness: While it’s an extra step, straining the raspberry sauce through a fine-mesh sieve is worth the effort. It removes all the seeds, resulting in a perfectly smooth, velvety swirl that matches the texture of the cheesecake filling itself.
FAQ section
Here are answers to some of the most frequently asked questions about making Raspberry Swirl Cheesecake.
1. Why did my cheesecake crack?
This is the most common cheesecake woe! There are three main culprits: over-mixing the batter (which incorporates too much air), over-baking, or cooling it too quickly. To prevent cracks, mix the filling on low speed, especially after adding the eggs. Bake only until the center has a slight jiggle, and follow the slow cooling process in the turned-off oven religiously.
2. Can I use low-fat or fat-free cream cheese?
For the best results, it is strongly recommended to use full-fat, block-style cream cheese. Low-fat or fat-free versions have a higher water content and stabilizers that can result in a cheesecake with a rubbery, thin, or weeping texture. The fat content is crucial for the rich flavor and creamy, dense consistency that makes cheesecake so decadent.
3. Do I really need a springform pan?
A springform pan is highly recommended because its removable sides allow you to present the cheesecake beautifully without having to invert it. If you don’t have one, you could use a 9-inch round cake pan with a 3-inch height, but you must line the bottom and sides with parchment paper, leaving an overhang to use as “handles” to lift the chilled cheesecake out. It can be a bit tricky, but it’s possible.
4. Can I use frozen raspberries for the swirl?
Absolutely! Frozen raspberries work perfectly for the sauce. You can use them directly from the freezer; there’s no need to thaw them first. They may release a bit more liquid, so be sure to cook the sauce until it is nicely thickened by the cornstarch slurry.
5. How can I be sure my cheesecake is done baking?
The “jiggle test” is the most reliable indicator. Gently nudge the side of the pan. The outer edges of the cheesecake should be firm and set, while the center 2-3 inches should still wobble slightly, like a gelatin dessert. The cheesecake will continue to cook and set up from the residual heat as it cools. An instant-read thermometer should register 150°F (65°C) in the center.
6. How long will this cheesecake last in the refrigerator?
Properly covered, the Raspberry Swirl Cheesecake will stay fresh and delicious in the refrigerator for up to 5 days. In fact, many people find that the flavor and texture are even better on the second or third day as the flavors meld.
7. Can I make this recipe gluten-free?
Yes, making a gluten-free version is very simple. The only ingredient containing gluten is the graham cracker crust. Simply substitute the regular graham crackers with your favorite brand of gluten-free graham-style crackers. The rest of the recipe ingredients are naturally gluten-free.
8. My raspberry swirl sank to the bottom. What went wrong?
This usually happens if the raspberry sauce is too thin or warm when you add it to the batter. Ensure you cook the sauce with the cornstarch slurry until it has thickened to a jam-like consistency. Also, allow it to cool completely to room temperature before dolloping it onto the cheesecake batter. A thicker, cooler sauce will stay suspended within the dense filling much more effectively.
Raspberry Swirl Cheesecake
Ingredients
This recipe is divided into three core components: the classic crust, the vibrant raspberry swirl, and the luxuriously creamy cheesecake filling. Using high-quality, room-temperature ingredients is the secret to achieving a flawless texture.
For the Graham Cracker Crust:
- 1 ½ cups (150g) graham cracker crumbs: This is the foundation of your cheesecake. You can buy pre-made crumbs or make your own by pulsing about 10 full sheets of graham crackers in a food processor until they are the consistency of fine sand.
- ¼ cup (50g) granulated sugar: Adds a touch of sweetness to the crust, complementing the buttery and savory notes of the crackers.
- 6 tablespoons (85g) unsalted butter, melted: This is the binding agent that holds the crust together, creating a firm, sliceable base that won’t crumble apart.
For the Raspberry Swirl:
- 1 ½ cups (180g) fresh or frozen raspberries: The star of the show. Fresh raspberries will break down slightly faster, while frozen can be used directly from the freezer, as they will thaw and release their juices while cooking.
- ¼ cup (50g) granulated sugar: Balances the natural tartness of the raspberries, creating a sauce that is both sweet and tangy.
- 1 tablespoon (15ml) fresh lemon juice: Brightens the flavor of the raspberries and helps the sauce thicken slightly by activating the natural pectin in the fruit.
- 1 tablespoon (8g) cornstarch mixed with 1 tablespoon (15ml) cold water: This slurry is a crucial thickening agent, ensuring your swirl has enough body to hold its shape within the cheesecake batter and not simply sink to the bottom.
For the Cheesecake Filling:
- 32 ounces (904g) full-fat block cream cheese, softened to room temperature: This is the most important ingredient. It MUST be full-fat block cream cheese, not the whipped kind in a tub, and it absolutely must be at room temperature to ensure a lump-free, silky-smooth filling. Set it on the counter for at least 4-6 hours before you begin.
- 1 ⅓ cups (265g) granulated sugar: Provides the primary sweetness for the cheesecake, perfectly balancing the tang of the cream cheese and sour cream.
- 1 cup (240g) full-fat sour cream, at room temperature: Adds a delightful tangy flavor and contributes to the ultra-creamy, dense texture of a classic New York-style cheesecake. Room temperature is key to prevent a lumpy batter.
- 2 teaspoons pure vanilla extract: Enhances all the other flavors in the cheesecake, adding a warm, aromatic depth.
- ⅛ teaspoon salt: A tiny amount of salt is essential in sweet recipes to balance the sugar and bring out the complexity of the other ingredients.
- 4 large eggs, at room temperature: Eggs are the primary structure-builder in the cheesecake. Adding them one at a time and mixing minimally ensures the cheesecake bakes up evenly without becoming airy or souffle-like. Again, room temperature is non-negotiable for smooth incorporation.
Instructions
Follow these steps carefully for a perfect, crack-free cheesecake. The process is methodical but not difficult. The keys are patience, room temperature ingredients, and a slow, gentle cooling process.
Step 1: Prepare the Oven and Pan
Preheat your oven to 350°F (175°C). Prepare a 9-inch springform pan. To create a waterproof seal for the water bath, place a large sheet of heavy-duty aluminum foil on your counter, then another sheet on top of it, perpendicular to the first. Place your springform pan in the center and carefully wrap the foil up the sides of the pan, ensuring there are no tears. This will prevent any water from seeping into your crust.
Step 2: Make the Graham Cracker Crust
In a medium bowl, combine the graham cracker crumbs and granulated sugar. Pour in the melted butter and mix with a fork until all the crumbs are evenly moistened, resembling wet sand. Press the mixture firmly and evenly into the bottom and about one inch up the sides of your prepared springform pan. Use the flat bottom of a measuring cup or glass to pack it down tightly. Bake the crust for 10 minutes. Once baked, remove it from the oven and place it on a wire rack to cool completely while you prepare the filling. Once the crust is out, reduce the oven temperature to 325°F (163°C).
Step 3: Create the Raspberry Swirl Sauce
While the crust cools, make the raspberry sauce. In a small saucepan, combine the raspberries, granulated sugar, and lemon juice. Cook over medium heat, stirring occasionally and mashing the berries with the back of a spoon as they warm up. Bring the mixture to a simmer. In a small bowl, whisk together the cornstarch and cold water to create a smooth slurry. Pour the slurry into the simmering raspberry mixture and continue to cook, stirring constantly, for about 1-2 minutes, until the sauce has noticeably thickened. Remove from the heat. For a seedless sauce (highly recommended for a smoother texture), press the mixture through a fine-mesh sieve into a clean bowl, using a spatula to push all the pulp through. Discard the seeds. Set the sauce aside to cool to room temperature.
Step 4: Mix the Cheesecake Filling
In the large bowl of a stand mixer fitted with the paddle attachment, or in a large bowl with a hand mixer, beat the room temperature cream cheese on medium-low speed for about 2-3 minutes, until completely smooth and free of lumps. Scrape down the sides and bottom of the bowl frequently. Add the granulated sugar and salt, and beat on low speed until just combined and smooth. Be careful not to incorporate too much air. Add the room temperature sour cream and vanilla extract, and mix on low speed until fully incorporated. Scrape the bowl again. With the mixer on its lowest speed, add the room temperature eggs one at a time, mixing until each egg is just barely combined before adding the next. Stop mixing as soon as the last streak of yellow disappears. Over-mixing at this stage is the primary cause of cracks, as it incorporates too much air.
Step 5: Assemble and Swirl the Cheesecake
Pour half of the cheesecake batter into the cooled crust and spread it into an even layer. Dollop about half of the cooled raspberry sauce over the batter in random spoonfuls. Use a butter knife or a skewer to gently swirl the sauce into the batter, making a few figure-eight motions. Be careful not to over-mix or you’ll lose the distinct swirl pattern. Pour the remaining cheesecake batter on top, smoothing the surface gently with an offset spatula. Dollop the remaining raspberry sauce on top. Use your clean knife or skewer to create your final, beautiful swirl pattern on the surface of the cheesecake.
Step 6: Prepare the Water Bath and Bake
Bring a kettle or pot of water to a boil. Place your foil-wrapped springform pan into a large roasting pan. Carefully place the roasting pan on the oven rack. Pour the hot water into the roasting pan, being careful not to splash any into the cheesecake, until the water level reaches about halfway up the sides of the springform pan. The water bath (or bain-marie) creates a humid environment in the oven, which is essential for baking the cheesecake gently and evenly, preventing cracks and ensuring a creamy texture. Bake at 325°F (163°C) for 60-75 minutes. The cheesecake is done when the edges are set, but the center 2-3 inches still has a slight jiggle to it (like Jell-O). Do not overbake.
Step 7: The Crucial Cooling Process
This is the most critical step for preventing cracks. Turn the oven off completely, but do not open the oven door. Let the cheesecake cool in the closed oven for 1 hour. After 1 hour, crack the oven door open slightly (you can use a wooden spoon to prop it open) and let the cheesecake cool in the oven for another hour. This slow, gradual cooling process prevents the cheesecake from shocking and contracting too quickly, which is what causes surface cracks. After the second hour, remove the cheesecake from the roasting pan and water bath. Remove the foil wrapping. Let it cool completely on a wire rack at room temperature.
Step 8: Chill Thoroughly
Once the cheesecake has reached room temperature, loosely cover it with plastic wrap (don’t let the wrap touch the surface) and transfer it to the refrigerator. Chill for at least 6 hours, but preferably overnight. This final chilling period is non-negotiable; it allows the cheesecake to fully set, making it sliceable and developing its full, rich flavor and creamy texture. Do not rush this step!
Nutrition
- Serving Size: one normal portion
- Calories: 550


