")


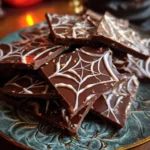
Of all the traditions that bubble up when the leaves turn and a spooky chill fills the air, my absolute favorite is our annual Halloween movie marathon. The whole family piles onto the couch, wrapped in blankets, ready for a night of delightful frights. But no movie night is complete without the perfect snack. For years, I struggled to find something that was both thematically appropriate and genuinely delicious, not to mention easy enough to whip up without spending the entire day in the kitchen. That’s when I discovered the magic of this Spiderweb Chocolate Bark Recipe. The first time I made it, the kids were mesmerized. They watched with wide eyes as I swirled the white chocolate into a delicate web, their excitement building with every step. When I finally brought out the finished platter, a chorus of “wows” echoed through the living room. It looked like something from a gourmet candy shop—a glossy, dark chocolate canvas intricately decorated with spooky, sweet webs. The best part? It tasted even better. The satisfying snap of the dark chocolate, paired with the creamy sweetness of the white chocolate web, was an instant hit. It has since become our non-negotiable Halloween treat, the centerpiece of our snack table, and the perfect fuel for an evening of ghosts, ghouls, and family fun. This recipe isn’t just about making candy; it’s about creating a little bit of edible Halloween magic that brings everyone together.
Ingredients
Here is the simple list of components you’ll need to weave your own delicious web of chocolatey goodness. The quality of your ingredients, especially the chocolate, will directly impact the final taste and texture, so choose the best you can for a truly gourmet result.
- 12 ounces (about 340g) high-quality dark or semi-sweet chocolate: This forms the rich, dark base of your bark, resembling a spooky night sky. Using baking chocolate bars (like Ghirardelli or a good couverture chocolate) rather than chips will yield a smoother melt and a more satisfying “snap” when broken. Look for a cacao percentage between 60% and 72% for a deep, balanced flavor.
- 4 ounces (about 113g) high-quality white chocolate: This is your “ink” for drawing the spiderwebs. Good quality white chocolate, made with real cocoa butter, is essential. It will melt into a fluid, pipeable consistency and provide a creamy, vanilla-like contrast to the darker base.
- 1 teaspoon coconut oil or vegetable shortening, divided: This is the secret ingredient for perfectly smooth, glossy chocolate. You’ll use a small amount in both the dark and white chocolate to help them melt evenly and prevent seizing, ensuring a flawless finish.
- Optional: Halloween-themed sprinkles, candy eyeballs, or edible glitter: While the spiderweb design is stunning on its own, a scattering of festive sprinkles (think oranges, purples, and blacks), a few spooky candy eyeballs peering out from the webs, or a dash of edible silver glitter can elevate the fun and visual appeal, especially for kids.
Instructions
Follow these detailed steps carefully to ensure your chocolate melts perfectly and your spiderweb design is sharp and impressive. The key is to work with confidence and a little bit of speed once the chocolate is melted.
Step 1: Prepare Your Workstation
Before you even think about melting chocolate, get everything in place. This process moves quickly once it starts. Line a large, rimmed baking sheet (approximately 13×18 inches) with parchment paper or a silicone baking mat. This is crucial for preventing the chocolate from sticking and allowing for easy removal and cleanup. Make sure the parchment paper lies flat. If it curls, you can use a tiny dab of water or oil under the corners to help it adhere to the pan. Set it aside.
Step 2: Melt the Dark Chocolate Base
This is the foundation of your bark. You have two primary methods for melting:
- Microwave Method (Easier): Chop your dark chocolate into small, uniform pieces. This helps it melt evenly. Place the chopped chocolate and ½ teaspoon of the coconut oil into a microwave-safe bowl. Microwave on 50% power for 30-second intervals, stirring thoroughly with a rubber spatula after each interval. It’s vital to use reduced power and stir frequently to prevent the chocolate from scorching. Continue until the chocolate is about 90% melted, with just a few small lumps remaining. Remove from the microwave and stir continuously until the residual heat melts the remaining lumps, leaving you with a smooth, glossy river of chocolate.
- Double Boiler Method (More Control): If you don’t have a microwave or prefer a gentler heating method, a double boiler is perfect. Fill a small saucepan with about an inch of water and bring it to a gentle simmer over medium-low heat. Place your chopped dark chocolate and ½ teaspoon of coconut oil in a heatproof bowl (glass or metal) that fits snugly over the saucepan without touching the water. The steam from the simmering water will gently melt the chocolate. Stir constantly until it is completely smooth. This method provides excellent temperature control and minimizes the risk of burning.
Step 3: Spread the Chocolate Canvas
Once your dark chocolate is perfectly melted and smooth, pour it onto the center of your prepared baking sheet. Using an offset spatula or the back of a spoon, spread the chocolate into an even, thin layer, about ⅛ to ¼ inch thick. You don’t need to spread it to the very edges of the pan; a rustic, rectangular shape is part of the charm. Work quickly but gently to create a uniform canvas for your web design.
Step 4: Melt the White Chocolate for the Web
Immediately begin melting your white chocolate, as the dark chocolate base needs to be wet for the design to work. White chocolate is more delicate and prone to overheating than dark chocolate, so be extra cautious.
Chop the white chocolate into very fine pieces. Place it in a small, microwave-safe bowl with the remaining ½ teaspoon of coconut oil. Microwave on 50% power in 15- to 20-second intervals, stirring well after each one. It will melt much faster than the dark chocolate. Stop heating when it is mostly melted and stir until completely smooth and fluid. Alternatively, use the double boiler method with the same precautions.
Step 5: Create the Spiderweb Design
This is the most creative and impressive part of the process!
- Transfer the White Chocolate: Carefully pour the melted white chocolate into a small piping bag, a squeeze bottle with a fine tip, or a small, sturdy plastic sandwich bag. If using a plastic bag, snip a tiny corner off to create a small opening for piping.
- Pipe the Circles: Working quickly while the dark chocolate is still wet, pipe the white chocolate into concentric circles on top of the dark chocolate base. Start with a small circle in the center, then pipe progressively larger circles around it, leaving about an inch of space between each ring. Don’t worry about perfect circles; slight imperfections will make it look more organic.
- Drag the “Webs”: Now, take a toothpick, a wooden skewer, or the tip of a sharp knife. Starting from the center dot, gently drag the tip outwards towards the edge of the chocolate, pulling through all the white chocolate circles. This creates the first line of your web. Wipe the tip of your tool clean. Turn the pan slightly and repeat, dragging another line from the center outwards. Continue this process, dragging lines from the center out, spacing them evenly around the circle like the spokes of a wheel, until you’ve gone all the way around.
- Refine the Web (Optional): For an even more intricate design, you can now drag lines in the opposite direction. Starting from the outer edge of the bark, drag your toothpick inwards toward the center, positioning these lines between the ones you just made. This creates a beautiful, layered web effect.
Step 6: Add Toppings and Chill
If you’re using sprinkles or candy eyeballs, now is the time to add them. Gently scatter them over the wet chocolate. The design is the star, so a light touch is often best.
Once you’re happy with your creation, carefully transfer the baking sheet to the refrigerator. Let the bark chill for at least 30-45 minutes, or until it is completely firm to the touch. You can also let it set at cool room temperature for a few hours, which can sometimes result in a glossier finish.
Step 7: Break and Serve
Once the bark is fully hardened, lift it from the baking sheet using the parchment paper. You can either use your hands to break it into rustic, irregular shards or place it on a cutting board and use a large, sharp knife to cut it into more uniform pieces. Your spooky, delicious Spiderweb Chocolate Bark is now ready to be devoured!
Nutrition Facts
This is a decadent treat, best enjoyed in moderation. The nutritional information is an estimate and can vary based on the specific types of chocolate and toppings used.
- Servings: 12
- Calories per serving: Approximately 210 kcal
- Fat: This bark is rich in fats, primarily from the cocoa butter in the chocolate and the added coconut oil. These fats contribute to the satisfyingly smooth mouthfeel and rich flavor.
- Carbohydrates: The main source of energy in this treat, carbohydrates come from the sugar content in both the dark and white chocolate.
- Sugar: This recipe is a confection, and as such, it contains a significant amount of sugar, which provides its sweet, craveable taste.
- Protein: While not a significant source, chocolate does contain a small amount of protein.
- Fiber: High-quality dark chocolate with a higher cacao percentage will contribute a small amount of dietary fiber.
Preparation Time
This recipe is prized for its speed and simplicity, making it a perfect last-minute party contribution or fun afternoon project.
- Active Time: 15-20 minutes. This includes chopping the chocolate, melting it, and creating the spiderweb design. The process is quick, with the majority of the time spent on the melting and artistic swirling.
- Chilling Time: 30-45 minutes in the refrigerator, or 2-3 hours at room temperature. The total time from start to finish is under an hour, delivering maximum visual impact for minimal effort.
How to Serve
The beauty of chocolate bark lies in its versatility. Its dramatic appearance makes it a showstopper, and it can be presented in numerous creative ways to suit any Halloween occasion.
- On a Spooky Party Platter:
- Arrange the broken pieces of spiderweb bark as the centerpiece of a large, dark-colored platter or a rustic wooden board.
- Surround it with other Halloween-themed treats like “mummy” pretzel sticks (drizzled with white chocolate), clementine “pumpkins” (with a small piece of celery for a stem), and a bowl of candy corn.
- The contrast of colors and shapes will create a visually stunning and irresistible dessert spread for your Halloween party.
- As Part of a Dessert Charcuterie Board:
- Embrace the “dessert board” trend by incorporating your bark.
- Fan out the pieces alongside bowls of fresh berries (like blackberries and raspberries), slices of green apple, a variety of crackers, and small bowls of caramel and chocolate dips.
- The sophisticated combination of sweet, tart, and crunchy textures makes for an elevated and interactive dessert experience.
- As Festive Party Favors or Gifts:
- Break the bark into smaller, manageable pieces.
- Place a few shards into clear cellophane bags.
- Tie the bags with festive orange, black, or purple ribbon. You can even add a small, plastic spider ring to the ribbon for an extra spooky touch.
- These make perfect take-home favors for party guests, thoughtful gifts for teachers, or sweet treats for neighbors.
- As a Gourmet Ice Cream Topping:
- Break the bark into very small bits or slivers.
- Serve it in a small bowl alongside scoops of vanilla bean, chocolate, or even pumpkin spice ice cream.
- Guests can sprinkle the bark over their ice cream, adding a delightful crunch and a burst of rich chocolate flavor. It’s a simple way to make a basic dessert feel special.
- For a Spooky Movie Night:
- Simply pile the bark high in a large bowl and place it on the coffee table alongside a big bowl of popcorn.
- It’s the perfect shareable, mess-free snack to enjoy while watching your favorite scary movies.
Additional Tips
Unlock the full potential of your Spiderweb Chocolate Bark with these eight expert tips, designed to ensure flawless results and inspire creative variations.
1. Choose Your Chocolate Wisely
The final product is only as good as your primary ingredient. For the best flavor and texture, avoid standard chocolate chips, which often contain stabilizers that prevent them from melting into a fluid consistency. Instead, opt for high-quality baking chocolate bars or couverture chocolate discs. These are designed for melting and will give your bark a professional, glossy finish and a clean, satisfying snap.
2. The Secret to Perfect Melting: Low and Slow
The number one mistake when working with chocolate is overheating it, which causes it to “seize”—becoming a thick, grainy, unusable mess. Whether you use a microwave or a double boiler, the key is gentle, indirect heat. Never expose the chocolate to direct heat or let any water get into it. Stir frequently and remove it from the heat source before it’s fully melted, letting the residual warmth do the final bit of work.
3. Temperature is Key for Swirling
For the cleanest web design, the temperature of your two chocolates matters. Your dark chocolate base should still be fluid and unset when you pipe the white chocolate on top. However, if your white chocolate is piping hot, it may just melt into the dark chocolate. Allow the white chocolate to cool for a minute or two after melting so it’s still fluid but not scorching. This temperature difference helps the colors stay distinct as you drag your toothpick through them.
4. Work Quickly and Confidently
Once you pour the dark chocolate base, the clock starts ticking. It will begin to set, especially in a cool room. Have your melted white chocolate ready to go immediately. Pipe your circles and drag your webs with a steady, confident hand. Don’t overthink it or try to correct small mistakes. The beauty of the design is in its quick, fluid creation.
5. Customization is King
Don’t be afraid to experiment! This recipe is a blank canvas.
- Color: Add a drop of oil-based food coloring (not water-based, which will seize the chocolate) to your white chocolate to create vibrant green, orange, or purple webs.
- Flavor: Add a ¼ teaspoon of peppermint extract to the dark chocolate for a spooky mint-chocolate bark, or a little orange extract to the white chocolate for a “creamsicle” vibe.
- Toppings: Go beyond sprinkles. A sprinkle of flaky sea salt on the dark chocolate before it sets adds a sophisticated flavor contrast. Crushed nuts, toffee bits, or crumbled cookies can also be added for extra texture.
6. Storage Secrets for Lasting Freshness
To maintain your bark’s snap and prevent “chocolate bloom” (the harmless but unattractive white or grey streaks that can appear), store it correctly. Place the broken pieces in an airtight container, separating layers with parchment paper. Store it in a cool, dry place, like a pantry. Avoid the refrigerator for long-term storage, as the condensation can affect the texture and appearance. It will keep beautifully for up to two weeks.
7. Make it a Kid-Friendly Activity
This recipe is perfect for getting children involved in the kitchen. Let them be in charge of the fun parts! They can help break up the chocolate, scatter the sprinkles, and place the candy eyeballs. The swirling part can be a little tricky for small hands, but older kids can certainly give it a try with some supervision. It’s a fantastic way to make festive memories together.
8. Cutting for Clean Edges
If you prefer neat squares or rectangles over rustic shards, you need a different technique. After the bark has been chilling for about 10-15 minutes (it should be partially set but still soft), remove it from the fridge. Use a large, sharp knife to score the bark where you want to cut it. Then, return it to the fridge to harden completely. Once it’s fully firm, you can easily break it along the scored lines for much cleaner edges.
FAQ Section
Here are answers to some of the most common questions about making Spiderweb Chocolate Bark, helping you troubleshoot any potential issues before they arise.
1. Q: Why did my chocolate get thick and lumpy when I melted it?
A: This is called “seizing.” It happens for two main reasons: overheating or contact with water. Even a tiny drop of water from a wet utensil or steam can cause the chocolate to clump up. To prevent this, make sure all your bowls and tools are bone dry. When melting, use low power in the microwave or gentle heat on a double boiler, and stir constantly. If your chocolate does seize, you can sometimes save it by vigorously stirring in a teaspoon of boiling water or more melted shortening, but it may not be suitable for this recipe afterward.
2. Q: Can I use regular chocolate chips instead of baking bars?
A: You can, but it’s not ideal. Chocolate chips are formulated with emulsifiers and stabilizers to help them hold their shape during baking. This means they don’t melt as smoothly or as fluidly as baking chocolate. Your final bark may have a slightly softer texture and a less glossy finish. If you must use chips, be sure to add the coconut oil or shortening to help them melt more evenly.
3. Q: My spiderweb lines are too thick and blending together. What did I do wrong?
A: This usually happens for one of two reasons. Either the opening in your piping bag was too large, or your white chocolate was too hot and runny. Start with a very small snip in the corner of your bag—you can always make it bigger. Also, let your white chocolate cool for a minute or two after melting. It should be the consistency of craft glue, not water, which will give you much more control over the lines.
4. Q: How far in advance can I make this for a party?
A: This is a great make-ahead dessert! You can make it up to a week in advance. Store it in an airtight container at a cool room temperature. Do not store it in the refrigerator long-term, as this can cause it to develop a dull surface or bloom. Making it a few days ahead of time will save you stress on the day of your event.
5. Q: How can I make this recipe dairy-free or vegan?
A: It’s very easy to adapt! Simply use high-quality dairy-free dark chocolate and dairy-free white chocolate. Many brands now offer excellent vegan chocolate options that melt beautifully. Ensure the brand you choose is free from any milk solids or whey. The coconut oil is already a dairy-free ingredient, so no substitution is needed there.
6. Q: My chocolate bark is soft and bendy, it won’t “snap.” What happened?
A: This is typically a sign that the chocolate wasn’t properly “tempered.” Professional chocolatiers temper chocolate to ensure it sets up hard and glossy. While this recipe uses a shortcut (adding oil), sometimes the type of chocolate or ambient room temperature can lead to a soft set. Chilling it thoroughly in the refrigerator is key. If it’s still soft, it could be the brand of chocolate. For a guaranteed snap, you would need to go through the full tempering process, but the shortcut method works well for a fun, homemade treat.
7. Q: Can I use a different color for the web instead of white?
A: Absolutely! This is a fantastic way to customize your bark. To color your white chocolate, you must use an oil-based or powder-based food coloring. Standard water-based liquid food coloring will cause the white chocolate to seize instantly. A vibrant orange, spooky green, or deep purple web would look incredible for Halloween.
8. Q: What is the best way to break the bark into pieces without it shattering everywhere?
A: For rustic, shard-like pieces, the best method is to lift the entire slab of hardened chocolate out of the pan with the parchment paper. Place it on a sturdy counter and simply use your hands to snap it into pieces. For more control and less mess, you can firmly tap the back of a large spoon in the center of the slab to create the first crack, then break it apart from there.
Spiderweb Chocolate Bark Recipe
Ingredients
Here is the simple list of components you’ll need to weave your own delicious web of chocolatey goodness. The quality of your ingredients, especially the chocolate, will directly impact the final taste and texture, so choose the best you can for a truly gourmet result.
- 12 ounces (about 340g) high-quality dark or semi-sweet chocolate: This forms the rich, dark base of your bark, resembling a spooky night sky. Using baking chocolate bars (like Ghirardelli or a good couverture chocolate) rather than chips will yield a smoother melt and a more satisfying “snap” when broken. Look for a cacao percentage between 60% and 72% for a deep, balanced flavor.
- 4 ounces (about 113g) high-quality white chocolate: This is your “ink” for drawing the spiderwebs. Good quality white chocolate, made with real cocoa butter, is essential. It will melt into a fluid, pipeable consistency and provide a creamy, vanilla-like contrast to the darker base.
- 1 teaspoon coconut oil or vegetable shortening, divided: This is the secret ingredient for perfectly smooth, glossy chocolate. You’ll use a small amount in both the dark and white chocolate to help them melt evenly and prevent seizing, ensuring a flawless finish.
- Optional: Halloween-themed sprinkles, candy eyeballs, or edible glitter: While the spiderweb design is stunning on its own, a scattering of festive sprinkles (think oranges, purples, and blacks), a few spooky candy eyeballs peering out from the webs, or a dash of edible silver glitter can elevate the fun and visual appeal, especially for kids.
Instructions
Follow these detailed steps carefully to ensure your chocolate melts perfectly and your spiderweb design is sharp and impressive. The key is to work with confidence and a little bit of speed once the chocolate is melted.
Step 1: Prepare Your Workstation
Before you even think about melting chocolate, get everything in place. This process moves quickly once it starts. Line a large, rimmed baking sheet (approximately 13×18 inches) with parchment paper or a silicone baking mat. This is crucial for preventing the chocolate from sticking and allowing for easy removal and cleanup. Make sure the parchment paper lies flat. If it curls, you can use a tiny dab of water or oil under the corners to help it adhere to the pan. Set it aside.
Step 2: Melt the Dark Chocolate Base
This is the foundation of your bark. You have two primary methods for melting:
- Microwave Method (Easier): Chop your dark chocolate into small, uniform pieces. This helps it melt evenly. Place the chopped chocolate and ½ teaspoon of the coconut oil into a microwave-safe bowl. Microwave on 50% power for 30-second intervals, stirring thoroughly with a rubber spatula after each interval. It’s vital to use reduced power and stir frequently to prevent the chocolate from scorching. Continue until the chocolate is about 90% melted, with just a few small lumps remaining. Remove from the microwave and stir continuously until the residual heat melts the remaining lumps, leaving you with a smooth, glossy river of chocolate.
- Double Boiler Method (More Control): If you don’t have a microwave or prefer a gentler heating method, a double boiler is perfect. Fill a small saucepan with about an inch of water and bring it to a gentle simmer over medium-low heat. Place your chopped dark chocolate and ½ teaspoon of coconut oil in a heatproof bowl (glass or metal) that fits snugly over the saucepan without touching the water. The steam from the simmering water will gently melt the chocolate. Stir constantly until it is completely smooth. This method provides excellent temperature control and minimizes the risk of burning.
Step 3: Spread the Chocolate Canvas
Once your dark chocolate is perfectly melted and smooth, pour it onto the center of your prepared baking sheet. Using an offset spatula or the back of a spoon, spread the chocolate into an even, thin layer, about ⅛ to ¼ inch thick. You don’t need to spread it to the very edges of the pan; a rustic, rectangular shape is part of the charm. Work quickly but gently to create a uniform canvas for your web design.
Step 4: Melt the White Chocolate for the Web
Immediately begin melting your white chocolate, as the dark chocolate base needs to be wet for the design to work. White chocolate is more delicate and prone to overheating than dark chocolate, so be extra cautious.
Chop the white chocolate into very fine pieces. Place it in a small, microwave-safe bowl with the remaining ½ teaspoon of coconut oil. Microwave on 50% power in 15- to 20-second intervals, stirring well after each one. It will melt much faster than the dark chocolate. Stop heating when it is mostly melted and stir until completely smooth and fluid. Alternatively, use the double boiler method with the same precautions.
Step 5: Create the Spiderweb Design
This is the most creative and impressive part of the process!
- Transfer the White Chocolate: Carefully pour the melted white chocolate into a small piping bag, a squeeze bottle with a fine tip, or a small, sturdy plastic sandwich bag. If using a plastic bag, snip a tiny corner off to create a small opening for piping.
- Pipe the Circles: Working quickly while the dark chocolate is still wet, pipe the white chocolate into concentric circles on top of the dark chocolate base. Start with a small circle in the center, then pipe progressively larger circles around it, leaving about an inch of space between each ring. Don’t worry about perfect circles; slight imperfections will make it look more organic.
- Drag the “Webs”: Now, take a toothpick, a wooden skewer, or the tip of a sharp knife. Starting from the center dot, gently drag the tip outwards towards the edge of the chocolate, pulling through all the white chocolate circles. This creates the first line of your web. Wipe the tip of your tool clean. Turn the pan slightly and repeat, dragging another line from the center outwards. Continue this process, dragging lines from the center out, spacing them evenly around the circle like the spokes of a wheel, until you’ve gone all the way around.
- Refine the Web (Optional): For an even more intricate design, you can now drag lines in the opposite direction. Starting from the outer edge of the bark, drag your toothpick inwards toward the center, positioning these lines between the ones you just made. This creates a beautiful, layered web effect.
Step 6: Add Toppings and Chill
If you’re using sprinkles or candy eyeballs, now is the time to add them. Gently scatter them over the wet chocolate. The design is the star, so a light touch is often best.
Once you’re happy with your creation, carefully transfer the baking sheet to the refrigerator. Let the bark chill for at least 30-45 minutes, or until it is completely firm to the touch. You can also let it set at cool room temperature for a few hours, which can sometimes result in a glossier finish.
Step 7: Break and Serve
Once the bark is fully hardened, lift it from the baking sheet using the parchment paper. You can either use your hands to break it into rustic, irregular shards or place it on a cutting board and use a large, sharp knife to cut it into more uniform pieces. Your spooky, delicious Spiderweb Chocolate Bark is now ready to be devoured!
Nutrition
- Serving Size: one normal portion
- Calories: 210